
I bought a loaf of bread a few weeks ago. This is noteworthy because I very rarely do this anymore. It’s become such a normal part of my weekly routine to mix up some no knead bread that I rarely have to buy the stuff. But occasionally, I still like to try new loaves.
The loaf I happened to pick out one day was lightly covered in a random assortment of seeds. It was totally good. But I figured that I could ramp up my own version of it and cram a ton of different seeds into and on top of the bread.
I wanted to make bread out of bird seed basically.
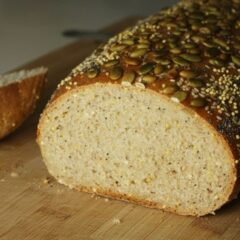
Not only did this turn out to be pretty easy, but it was maybe the best loaf of bread I’ve baked all year.
Bird Seed Bread
Equipment
Ingredients
- 1 ⅓ Cups assorted seeds or grains, I used millet, poppy seeds, sesame seeds
- 3 ¾ Cups bread flour, 17 ounces
- 1 Cup whole wheat flour (you can use all bread flour if you want), 4.5 ounces
- 1 ½ Teaspoons salt
- ¼ Cup powdered milk, or 1/4 Cup whole milk and minus 1/4 Cup from water amount
- 2 Tablespoons sugar
- 2 Teaspoons instant yeast
- 1 large egg slightly beaten
- 4 Tablespoons unsalted butter, melted
- 1 ¾ Cups water, room temp
Instructions
- Add all your dry ingredients to a bowl including the seeds and grains and mix up.
- Whisk together liquid ingredients and then stir into dry ingredients.
- If using a stand mixer, mix on low speed with a dough hook until a ball forms. Then mix on medium-low speed until it passes the windowpane test. If you’re using your hands, stir the ingredients together and then knead on a floured surface until the dough passes the windowpane test, about 12 minutes of kneading.
- NOTE: It’s kind of hard for this dough to actually pass the windowpane test due to all the seeds in the bread, but it should be a very smooth dough.
- Once the dough is formed, add it to a lightly oil bowl, cover it with a damp towel, and let it rise at room temperature for 2 hours, or until it doubles in size.
- Once you’re ready to form your loaf, roll the dough out into a large rectangle. Then roll it up and set it so the seam is on the bottom of the loaf. Tuck the edges down so it’s a solid smooth loaf.
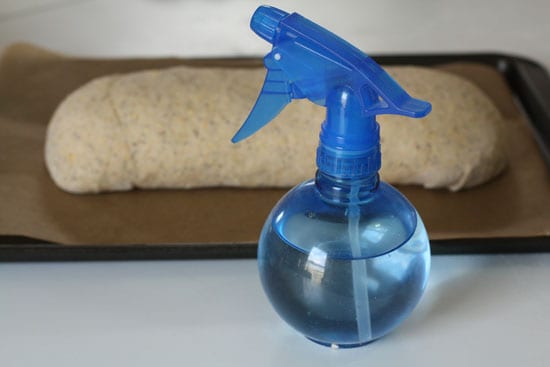
- Spray the loaf with water. Spray it well! Then sprinkle on your desired seeds and grains. Really press the seeds into the loaf so they stick well.
- Cover the loaf with a damp towel and let it rise for another 30 minutes.
- Bake the loaf at 350 degrees for 45-50 minutes or until it’s a deep golden brown.
- 9) Cool the loaf on a wire rack for an hour before slicing and serving.
- The loaf will store perfectly fine in a plastic bag for a week or two in the fridge. It makes the best toast you’ll ever eat!
Notes
Nutrition
Did you make this recipe?
Making the Dough
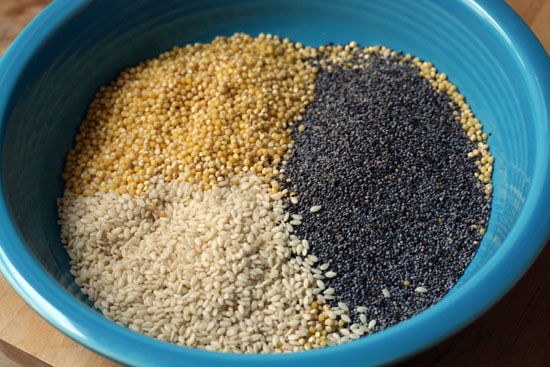
You could possibly even go crazier than I did on the seed/grain additions, but I kept it pretty simple. I decided to mix three things into the actual dough itself: Millet, poppy seeds, and sesame seeds.
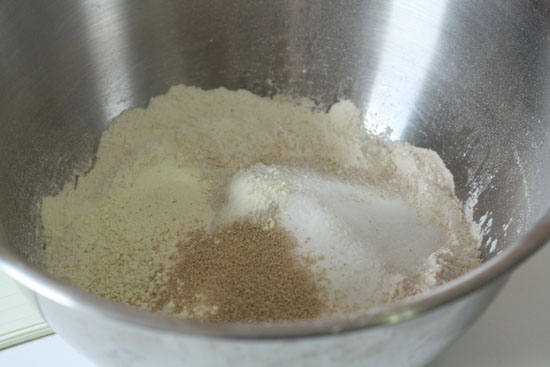
As with most doughs, start by adding all your dry ingredients into a large bowl. If you down have powdered milk handy, you can use normal milk. Just add 1/4 Cup whole milk and subtract 1/4 Cup from the water amount.
So anyway, mix all your dry stuff together!
Then add all your seeds and grains to this dry stuff. I was a bit worried at this point that this wasn’t going to work, but too late to turn back now!
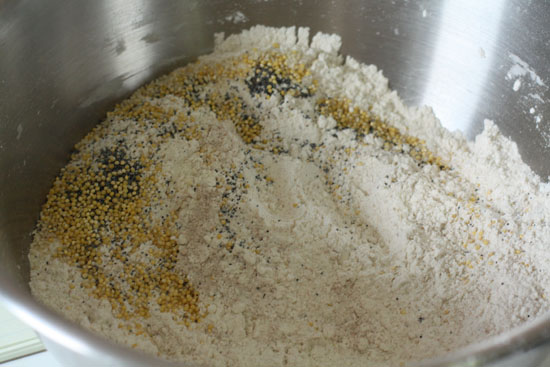
Once all your dry stuff is well-combined, whisk together your water, melted butter, and egg in a separate bowl and then add that to the party.
If you’re using a mixer, just mix everything on low until it forms a ball. Or, if you’re working with your hands, use a big spoon to pull everything together. It should be a pretty loose dough, but not sticky at all. If it’s sticky, add more flour.
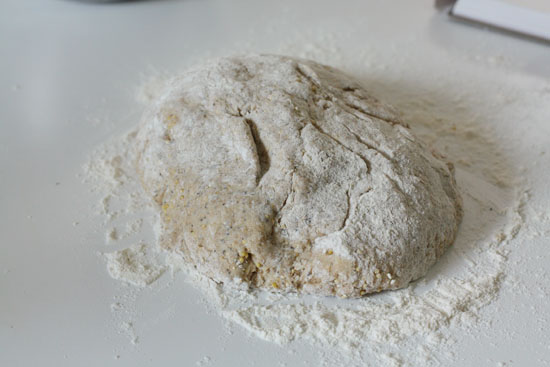
Once you get it in a ball, you can either switch to the dough hook and mix on medium-low for 8 minutes or so or, if you’re using hands, turn it out onto a floured surface like so:
Kneading the dough
People always complain that kneading dough is a lot of work, but I find it to be relaxing actually. Sure. It’s not as easy as flipping a switch, but it only takes ten minutes and trust me, the results are worth it.
In this case, I think I added a bit too much water to my dough, so I had to knead in probably another 1/2 cup of flour. The dough should be smooth, but not sticky, so if it’s sticky then you need more flour!
After 10-12 minutes of kneading, you should have a wonderful ball of bird seed dough!

In theory, this dough should pass the windowpane test, but it’s kind of hard to actually test it because the seeds break up the windowpane action. If you knead studiously for 10-12 minutes though, you’ll be in a good place.
The first rising
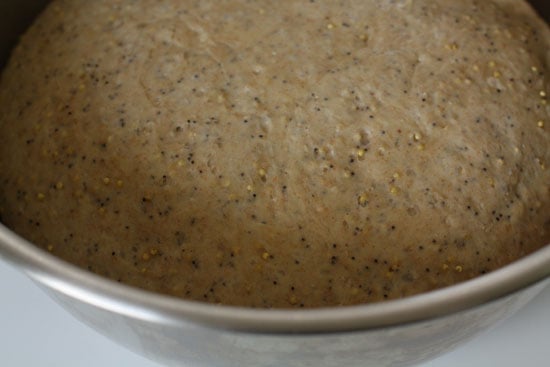
Once your dough is formed, lightly oil a large bowl and add your dough. Give it a turn to coat the dough evenly with oil. Then cover it with a damp towel and let it rise for 2 hours.
It should easily double in size. It’ll be very pretty. Like this:
Shaping the Loaf
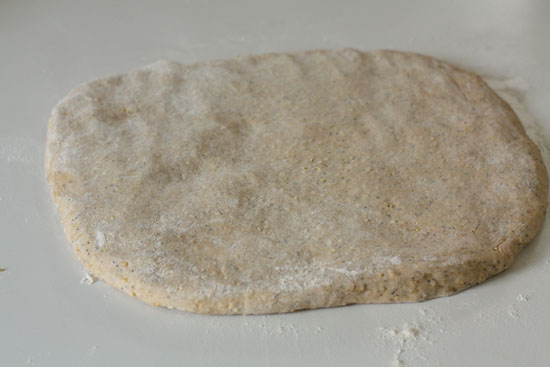
If you’re making a big loaf like I did (which I recommend), then it’s really easy. Lightly flour a clean surface and roll your dough out into a large rectangle. Keep it about 1/2 inch thick.
Then roll it up! Turn it so the seam is on the bottom of the loaf and kind of tuck in the ends so you end up with smooth edges all the way around.
Like this.
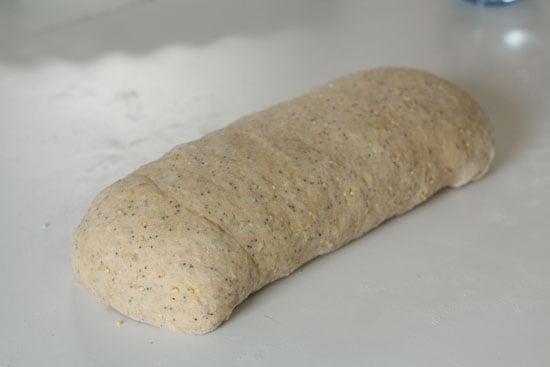
Don’t stress about the loaf forming. Even if it isn’t perfect, it’ll be delicious.
Once your loaf is formed, lay it on a baking sheet lined with parchment paper.
Sticking on the Seeds
Sticking things onto a loaf of bread can be tricky. They have a tendency to fall off.
Here’s the three tips to topping success:
1) Use more water than you would think to wet the top of the loaf. It should be glistening wet, but not soggy.
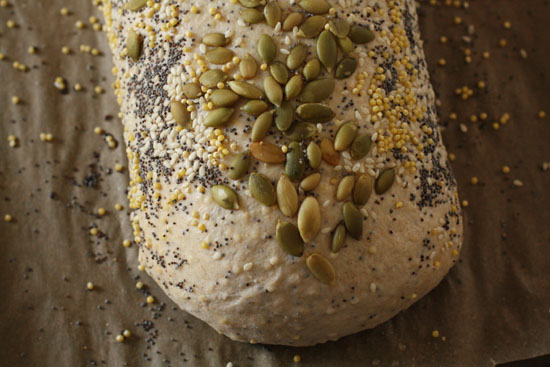
2) Really press the seeds in. Don’t just sprinkle. They should leave indents.
3) Add the seeds before you let the loaf rise for a second time.
I have this nifty little blue spray bottle that I use for my loafs. You could also use a brush to brush on some water or just pat down the loaf with wet hands.
As far as toppings go, I used the same seeds that I incorporated into the dough and added some big pumpkin seeds also. These would be a bit large for the dough itself, but they look and taste amazing on top.
Like I said, really press all the seeds into the dough.
The Second Rising
After your seeds are stuck on, cover the loaf with a damp towel again and let it rise for another 30 minutes.
Baking
Bake this at 350 degrees for 45-50 minutes. It should be a wonderful golden brown color and sound kind of hollow if you thump it. To make sure it bakes evenly, also turn your baking pan halfway through the cooking.
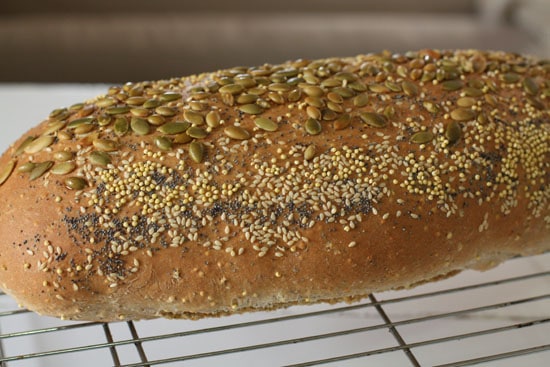
As with all breads, let this cool for at least an hour before cutting into it. It’ll be tempting I know, but there’s still a lot of important things going on in there and you don’t want to mess it up by slicing into it and letting all the steam escape too quickly.
I like the pictures for this bread, but they don’t really even do it justice. There’s something about the texture that all those seeds give that make this really wonderful.
If you’ve never, ever, baked a loaf of bread, this can be your first loaf. It isn’t terribly hard, doesn’t require days of prep, and you don’t need any special equipment. It’s also the best loaf of bread I’ve made all year.
Hopefully I’ve planted the seed…
Window On The Prairi
Very pretty!
Suzanne
mary
Anyway to do this with the no knead bread method??
Nick
I think definitely although I haven't tried it. Just mix in the seeds when you mix together your dry stuff. Don't see why it wouldn't work! No knead bread is so moist that you probably won't need to spritz much to get the seeds to stick on top.
Victoria Howell
Since the recipe calls for egg, would it be safe to use the 12-18 hour proofing? I’d love to make it the no knead way but have been afraid because of raw egg. I’ve made this bread the same way you do many times and we love, love it!
Mimi
Gorgeous bread. You should submit it to this week's YeastSpotting event at the Wild Yeast blog so you can introduce some new readers to your blog.
Nick
Good idea! I love yeastspotting and haven't submitted one in a while. Done!
Susan/Wild Yeast
This reminds me of a bread we made in school called Prairie Bread. I love all those seeds! Thanks for sending to YeastSpotting.
hobby baker
LOL, I always called my mom's seedy breads "birdseed bread" when I was growing up. Now I love them! (And yours looks beautiful!)
Amanda
I just made this bread and it tastes friggin’ amazing. I’ve been looking for a good seed-bread recipe and this is awesome. Thanks so much for posting and taking beautiful pictures.
Amanda
Megan
Is this a good loaf to use for sandwiches?
Nick
Yes. Yes. A thousand times yes. :)
Blue
I made this recently and substituted the butter for peanut butter, as we didn’t have butter in the cupboard. It turned out perfect, delicious, and a little extra nutty too – I definitely recommend it!
Jackie
Help! I don’t have instant yeast & I’m a brand new bread maker. Can I use regular yeast & what do I need to alter in the steps?
THANK YOU! Can’t wait to eat this bread!
Nick
Hey Jackie, dry yeast should work as well. I think any yeast will work fine. Good luck!
Angie
Thank you, thank you, THANK YOU for this recipe. I looove bread and had a bunch of millet in my pantry without any idea of what to do with it. Even though i’m scared of yeast I made this! And it was soo good! Keep up the amazing recipes!
Francoise
Hiya! Glad to see someone giving a go at a multi-seed loaf. My first try was a disaster. I went 300g bread flour and 100g rye flour + the rest and seeds. Just like yours. Result was dense unappetising loaf.
I got to ask you this question now. How about for the first rise/proving, you mix everything except the seeds. This is to get a good window test so you can proceed with confidence. Once you’re happy with the first rise, knock the air out and then you knead in or roll-pin the seeds into the dough. You will get the rectangular dough which you then shape into a round loaf or dump it in a loaf tin for 2nd rise. How does that sound to you? Thanks.
Nick
I don’t see why that method wouldn’t work Francoise and is probably better actually so you can make sure your dough is the right consistency before you start mixing in stuff. Makes sense to me!
Francoise
I’ll tell you why I thought I’d ask first. You see, in your method the seeds make a homogeneous mix with the flour. So the end result will have seeds from the centre right to the edge of every slice. But as you pointed out, the window test doesn’t really work and am thinking that shaping it will be sketchy.
I will go ahead with what I mentioned. Fingers crossed, it won’t be another waste of good ingredients. God i hate waste. My goal is to get similar result as in the sandwich slices you get in a posh restaurant or diner. Thanks, will keep you posted! F. x
Francoise
Nick, mission accomplished. It worked really well. Window test was ok. After first rise, knock down the dough and right there in the proving bowl, add half the seeds in the deflated dough. Knead well, turn dough over, add rest of seeds. Basically I just added the seeds whenever I spotted an area of dough that didn’t get any seeds. The rest is as you described (roll dough out, shape, 2nd rise, etc…). Thanks.
Nick
Awesome! Thanks. I’m gonna add this post to a list of posts to update. ;)
Doneen
Just ran across this awesome recipe ,turned out perfect …..and the only thing I did different was substitute coconut oil for the butter….The family has already requested more more more….Thank you ….AWESOME….
Nick
Awesome Doneen! Really glad you liked it!