
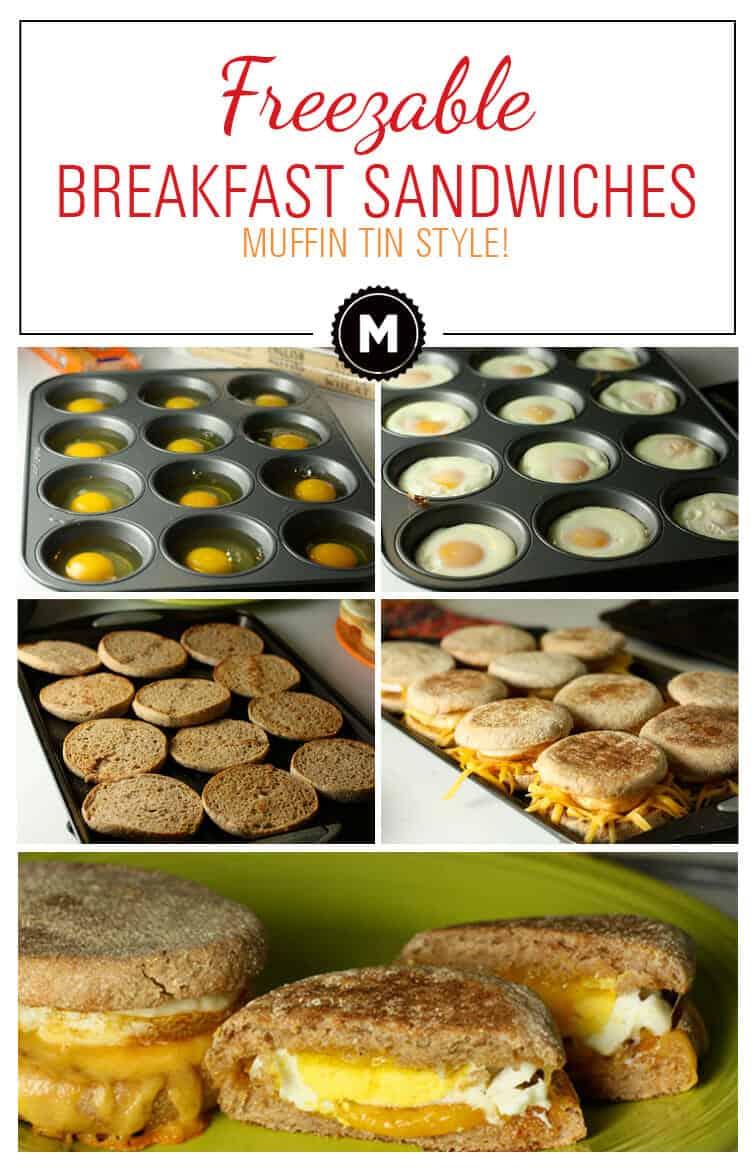
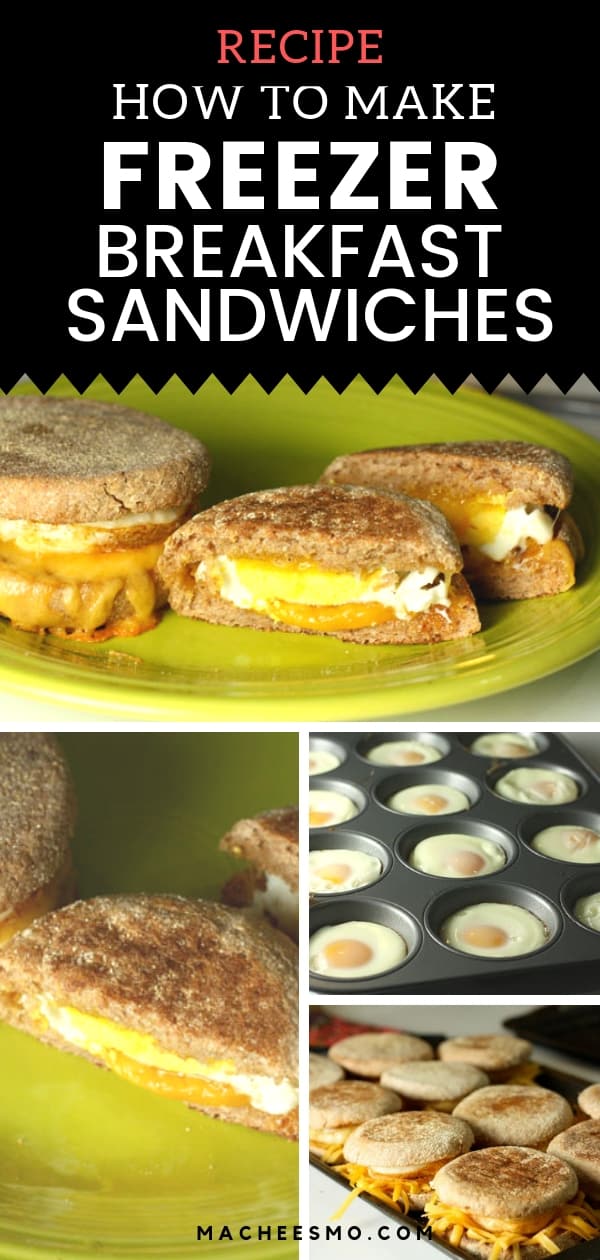
After I made baked chicken nuggets a few weeks ago and explained my deal with Betsy (if she wants something from McD’s, I try to make it for her), I got a few emails saying that the only meal some people will eat at McDonald’s is breakfast. Breakfast sandwiches to be specific.
This struck me as kind of odd because most of the stuff on their breakfast menu is even easier to reproduce at home than the stuff on their other menus. Take their classic Egg McMuffin for example. I was able to make some breakfast sandwiches in no time that I would put up against their version any day of the week.
Breakfast Sandwiches
The Rundown
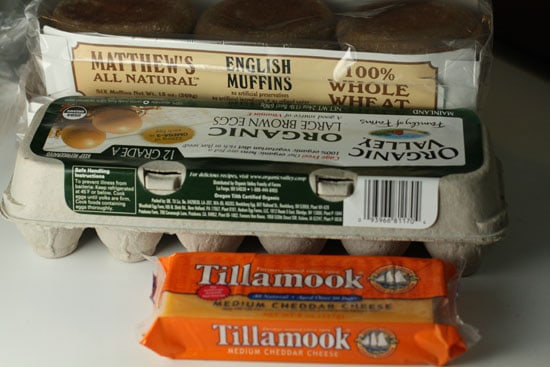
I made 12 breakfast sandwiches for this post because they are really easy to freeze and they reheat nicely. I used the same basic ingredients for my versions (English Muffins, eggs, cheese). I also used butter while they use something called “Liquid Margarine.”
My total bill for these came to $16.00 or about $1.33/sandwich. I think McD’s sells them for about $1 a piece, so it would cost you maybe $12-$13 to buy the same sandwiches there.
Here’s some interesting facts though about what a bit of time and that extra $3 gets you:
- Whole Grains. McD’s uses “enriched” wheat flour in their product. I used a nice whole wheat product.
- No Less Saturated Fat. Their version has 5 grams.
- Less Sodium. One McDonald’s Egg McMuffin (with no sausage or anything) has 580g of sodium, about 1/4 of what you should be eating every day.
- Real Cheese. I used a nice medium cheddar cheese. Their version can barely be called cheese.
- Storability. I can freeze mine. I wouldn’t recommend buying an Egg McMuffin and then coming home and freezing it. That means when I want one, I just have to open my freezer.
- A few, real ingredients. Guess how many ingredients (most of which you can’t pronounce) are in an Egg McMuffin… 55. English Muffin. Cheese. Egg. 55 ingredients. Go figure.
Egg and Cheese Breakfast Sandwiches

Equipment
Ingredients
- English Muffins
- Large eggs
- Cheese, I used about 10 ounces for 12 sandwiches.
- Butter, or olive oil (optional)
Instructions
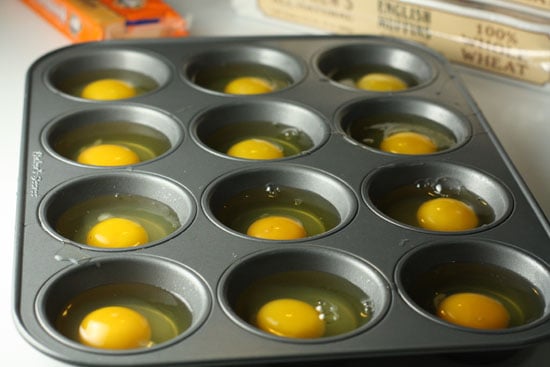
- Lightly oil a muffin tin and crack an egg in each tin.
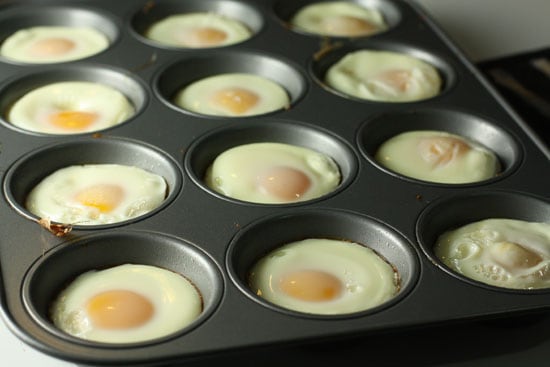
- Bake the muffin tin with eggs in a 350 degree oven for 10-15 minutes. Depending on your egg size, start checking them early to make sure they are cooked through. Try not to overcook them!
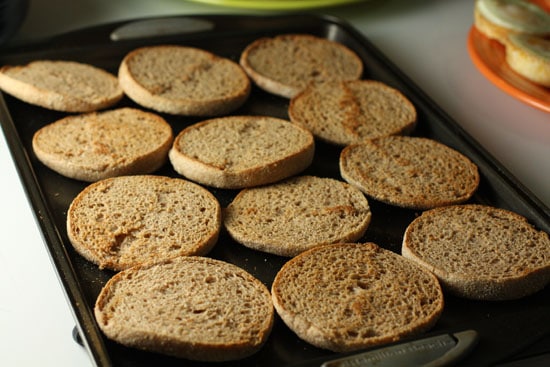
- Slice all the muffins and toast them in the oven for 10 minutes or you can toast them one at a time if you want.
- Add an egg, grated cheese, and any protein or veggies that you want to each sandwich.
- If you want to eat one right away, I recommend sticking it in the oven as a sandwich for 5-10 minutes to melt the cheese and everything.
- You can also stick all your sandwiches on a baking sheet and stick it in the freezer. Leave them in the freezer until they are frozen, about an hour. Then wrap each sandwich individually in plastic or foil and store all the individually wrapped sandwiches in a freezer safe bag.
- When reheating, you can microwave if you’re in a hurry, but it’ll make the muffin soggy. If you can plan ahead a bit, bake the sandwich at 350 degrees for about 25 minutes. You can even keep it wrapped in the foil if you used foil to store the sandwiches.
Nutrition
Did you make this recipe?
Breakfast Sandwiches – Cooking the Eggs
To get that classic Egg McMuffin shape to the egg is kind of tricky. Oh wait. No it’s not. Just grab a muffin tin and and very lightly oil each spot in the tin with either butter or spray oil (I used a very small amount of butter on a paper towel.)
Then crack an egg in each muffin area!
Stick these in a 350 degree oven for about 10-15 minutes. Sometimes for sandwiches like this, I like my eggs runny, but since I was freezing them and everything, I thought it’s probably a better idea to make sure they are cooked through.
While you’re waiting for your eggs to cook, grate some cheese.

After about 10-15 minutes, you’ll have these perfectly cooked, perfectly shaped eggs. These are just asking to be put on a sandwich!
I also decided to toast up all my English muffins. Given that I was making a bunch, I just sliced all of my muffins in half and laid them all out on a baking sheet. After about 10 minutes in the oven (you can toast these at the same time as your eggs are cooking), they’ll be toasty and ready to go.
Making the sandwich
This is not rocket science people. Take half of a muffin, add some cheese, add an egg, and apply the top half of the muffin.
If you’re so inclined, add a tiny smear of butter onto the top half of the muffin, just for some added flavor. You could also hit the sandwich with some pepper if you wanted or even some hot sauce!

Once everything is set, it doesn’t take much time to bang out a whole bunch of these. I would never call this Fast Food, but it’s definitely a fast way to make food.

Now you have two options:
Eat these right away!
If you wanted to eat these right away, just stick them back in the oven for 5 or 10 minutes until they are warmed through and the cheese is melted and delicious.
Or…
Store for later!
If you want to store these for later, stick all your sandwiches on a baking sheet and put them all in the freezer, uncovered and unwrapped. Leave them in there for about an hour. This will give them a chance to give off some moisture and also freeze a bit. If you were to wrap them up right away then there would be all kinds of liquid that would condense.
But don’t forget about them or they’ll get freezer burned. Pull them all out after an hour or two and wrap them individually in plastic wrap or foil and then store them in a freezer safe plastic bag. They will keep for a few weeks without a problem.

Breakfast Sandwiches – Tip for Heating (or Reheating)
There is really only one tip: Don’t use a microwave. I tried one in the microwave and it is just okay. It’s definitely edible and if you’re in a rush, it’ll have to do, but if you have the time, heat them in the oven. From completely frozen to warm and melted, it’ll take about 25 minutes in a 350 degree oven.
The problem with the microwave is that the muffin tends to get a bit soggy. And nobody likes a soggy muffin!

Do these breakfast sandwiches require a tiny bit more time and money than the Fast Food version? I suppose so yes. I can’t deny that.
But I do think that the tiny extra effort and amount of money you put in will pay handsome dividends in almost all cases. In this case, you get practically the same dish except it’s way healthier and tastes better.

Check out these other breakfast recipes!
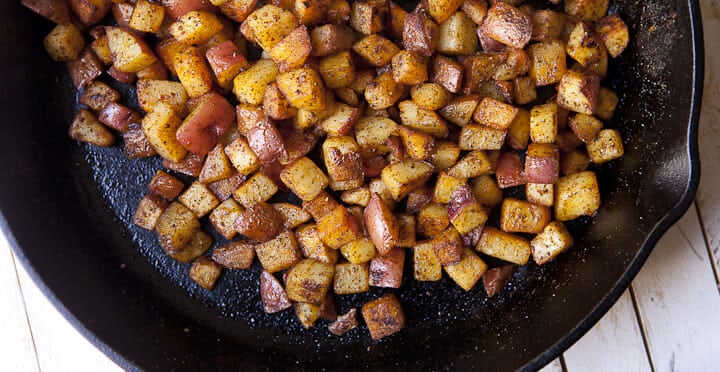
Home Fries at Home
Perfect Soft-Boiled Eggs

rita
$16?! That seems like a lot. Waiting and buying on sale, one could easily spend one-third of that amount, which would make it much more economical. But even if it cost slightly more in your instance, a McD's sandwich could never beat a fresh, homemade one!
Nick
Oh yea… you could definitely do cheaper. I bought nice eggs and whole grain muffins which were a bit more expensive.
Jess
For $16, from the picture, it looked like he used all natural ingredients, name brand cheese, and organic eggs. Not that there's anything wrong with that! But If you want them to be cheaper than McDonalds I bet they would be if you used store brand cheese and english muffins (my safeway has storebrand 100% whole wheat english muffins) and regular old nothin fancy eggs. It would still be healthier than going the fast food route too. I can't wait to try out this recipe:) I'd like to try out reheating them in a toaster oven
carol
its a little easier, and less mess if you spray your muffin tins with oil spray and line the tins with the paper muffin liners …. no mess
Jenn
Just letting y’all know…I work at McDonalds and we charge way more than a dollar per muffin! I know its between 3 and 5, but I’m not sure the exact price. So yeah, i’d definitely go for this cheaper, healthier method!!!
Nicholl
I managed a McDonalds. The sausage muffins are $1. The muffins with eggs and sausage are something like $1.50. The egg mcmuffin, which has ham on it is over $3.00.
Donnie
Apparently managers are not required to know prices. The cheapest McMuffin with egg is the Sausage McMuffin with egg and it’s $2.79, not $1.50.
Gale
The McDonalds in my town charges $3.09 for the egg McMuffin alon
Catherine
The prices of McMuffins change depending on the area (rural vs metro), and even country. In Australia, they cost around $3.50, more or less depending on how many toppings they have. I made this recipe using home-brand ingredients: $2 for a pack of six muffins, $3 worth of cheese, $2.50 for 6 eggs (less if you brought the full dozen), and I added ham which was $4 for a pack of 6 slices of premium ham. It was $1.91 for each muffin, far cheaper.
Bre
Yes they are 3.00 per sandwich, I get one every morning on my way to work with a hot cup of coffee!
leftfoot
Add all of the ingredients in your ingredients (especially the bread and "liquid margarine") and while I don't think it will be close to 55, I bet there's 20. More if using a presliced processed cheese (simply because they melt easier without being greasy which can happen with regular cheese when melted). It would be interesting to know what the fat and sodium contents were in actual comparison.
What about Popeye's red beans and rice or gravy? Since I left Florida, I haven't been able to have it and it was my favorite fast food items. Or Sonic's Cherry Limeade. I have been trying for months to get it right, but I just can't get it.
Nick
That might be right. I didn’t use “Liquid Margarine”. That was the Big M’s version.
Cherry Limeade! Nice call… I love that drink in the summer.
Kim
Eating McD's anything everyday will kill you…..this recipe is actually very healthy!!
Laura
McD’s uses fresh eggs, english muffins, (yes white ones), 1 slice of processed american cheese and lean canadian bacon on an egg mcmuffin. if you ask for no margarine, they will do that. Take off the cheese and the muffin comes to 300 calories. not sure how that’s such a bad thing?
Nicholl
The muffins are prebuttered before they even cook them. they fry the eggs and the ham on the stove – more butter so the eggs don’t stick. they are far from healthy.
Nick
Thanks for the comments Nicholl. I never knew their exact cooking process…
Cheers!
Nick
Sharon nelson
Sonic also has a diet Cherry Limeade. Delicious. And from 2 pm to 4 pm every weekday, they are available at happy hour price!
lbmastiff
I was thinking the same thing about the ingredient list. I'm sure it's much, much better for you than McDonalds, but it's not 4 ingredients compared to 55! It is still a wonderful idea though that I will definitely be making for the Hubby and I that leave for work before 6 a!
alicia
i worked at sonic…all you need is some cherry syrup(med has about 1/2tsp) sprite(or any other lemon lime drink) and a quarter slice lime squezzed in
Jerry
IBC makes a Cherry Limade in the bottle that’s almost identical to Sonics. Buy mine at Winn Dixie.
Jchamp
The key to making Popeye’s Red Beans at home are SMOKED ham hocks!
CGCouture
How about a chalupa? Like what Taco Bell makes? I can't ever figure out what to put with the ground beef to get it exactly right. I've tried several "copy cat" recipes and none of them have been close enough for me to consider making again. :-( Oooh, or how about making a stuffed crust pizza where the cheese actually stays INSIDE the crust? What's the secret to that?
Nick
Haha… I can give that a shot. I’ve definitely had some ideas on the stuffed crust pizza…
Anita
I used to work at Papa Murphy’s and the owners would braid string cheese into the crust, like the braid on Papa Murphy’s stuffed or desert pizza. I don’t know if there’s a how to video anywhere.. maybe. It’s kind of hard to describe how you do it.
BitofByrd
I make stuffed crust pizza at home and i use a string cheese stick cut in half long ways and then fold the crust over it.
so good.
My recent post See you later, Not goodbye
erin
the reason you can't recreate the ground beef is because it is mostly gluten filler, not meat.
tammy
as far as pizza crust goes make dough and put string cheese on edges and roll over stick——- works great
Sharon
For Taco Bell I have used ground turkey and the meat was close to the texture and taste
The Nervous Cook
It would never occur to me to pre-make and then freeze breakfast sandwiches, but hot diggity that’s a pretty solid idea!
And I say cheap shmeap — the whole reason you don’t want to blow your dough at a fast-food joint is that you’re not paying for anything but filler, saturated fat, grease and warming lamps. I’d rather pay a little more for higher quality food — not “food product.”
Anita
Grade B eggs.. most of the time you can find a dozen that have mostly brown eggs in them. More than likely one of the eggs in a EB (or the like) egg carton broke. Much less expensive. Unless you HAVE to eat only organic, that’s the way to go. (The eggs my aunt brings home are from a farm, can’t get any better than that)
Kim
With farm eggs the chickens eat grass , corn and natural substance on the ground. That is why farm eggs taste better. The chickens at a egg plant are fed ground corn. That is why your eggs aren’t as tasty.
fasteddie
McD’s for a buck is the sausage mc muffin – which I think is their nasty sausage on a muffin. No egg, no cheese. An egg McMuffin has canadian bacon ( which yours is missing ) but is like $2.69 or more.
I make these at home with canadian bacon or ham. They’re awesome.
Monica
Most locations the Egg McMuffin is over 3.50 +tax.
Jade
I don’t see how yours has no saturated fats, because as far as I know, the milk fats in cheese and butter are both saturated.
Regardless, these look fantastic, and I’ll have to mention freezing them to the gentleman, who tends to make himself one fresh at 5:30am on a work day, only he adds a slice of ham. Yum.
Nick
Excellent catch. Post updated… Mine has less, but definitely some… especially if you go the butter route.
Chris
Nah, to be authentic McD’s, you need to add about 1/2 cup of salt! Everything there tastes so salty to me.
Great breakfast idea, especially with a houseful of guests.
Lea
I make these somewhat often on the weekend for my dear darling husband and myself. Although I usually put bacon on them too. I have never thought about freezing them, though-yet another Nick idea I need to steal!
Penelopi Tsaldari
Gosh, I really enjoyed reading this post. Although I do not eat at McDonalds, no bad reason, just enjoy cooking at home so much. This is a post that really caught my attention because it is so easy to prepare. Wish more Mom’s, would read it. Maybe I should post it on the PTA board. Yeah!
Love this blog presentation, the photos are great and it’s all “get to the point” in a friendly way.
Luv it!
Penelopi
Nick
Thanks! Feel free to post it wherever you want.
Amber
Hi wondering about reheating these . Do you leave them wrapped in the foil if heating in oven ? Or unwrapped ?
Nick
Hey Amber, if you’re heating in the oven, I leave them wrapped in foil generally. Thanks!
Sue
Love this! The eggs baked in a muffin tin? BRILLIANT!
Kevin
Very nice looking if not lots of work……………hate to say it that even as an owner of an organic food company I’ll keep going to McD’s for this breakfast — although not a regular thing — $1.65 per sandwich, when you buy 2 at a time $1.00 for any size delicious Newman’s Organic Coffee (I realize Newman’s Coffee may not be offered where you live — to bad).
My Golden Retriever looks forward to eating the second sandwich — we do this no more than once a month.
How often would you or should you eat this stuff? — for me the perfect breakfast is 1 cup of homemade, greek style, fat-free yogurt, 1/2 banana, 2-3 berries and 1/4 cup (1 ounce) Berkshire Grain Organic Granola. Nothing like homemade yogurt — makes you feel good, and so satisfying.
Wanna lose weight?? Try my breakfast 2x/day — 1000mg of Calcium per day, eat one sensible main meal — you’d be surprised.
As far as Nick’s Fast Food question……………….”Gimme that Filet of Fish, Gimme that Fish………….
Nick
Yea… Honestly, I don’t eat these very often. I’ve had a few this week though and they are hitting the spot on a dreary week.
Eating one right now actually as I go through these lovely comments! :)
Kathy
The sauce from chick-fil-a!!
They are the only fast food chain I’ll eat at. The chicken sandwiches and fries are pretty good and easily replaced, but Mmmm that Chick-fil-a sauce! I really wish I could find a healthier replica and one without egg yolks.
I’m a long time lurker, but I really like your blog! My Bf saw this post and was like “Must make egg mcmuffins!! AND ADD BACON!!!” I think his brain exploded from the idea of having breakfast sandwiches on hand at all times. We’ll definitely be making these! :)
Celia
There is a copycat recipe on Pinterest for that sauce. I don’t remember what is in it, though.
lululu
i just had a sausage egg mcmuffin from mcdonalds for breadkfast cos i was still trying to figure out how to make that kinda egg. I’ve tried so many ways with no success. I’ve even tried to use a bigger sized round shaped cookie cutter, it didnt work neither.
now, what you did simply lights up my sky. how could i not think of using the muffin tin?!
i think it’s my time to quit mcdonalds! :)
Su-Lin
I love these! And if I had a bigger freezer, I’d definitely make them. How would it work with sausage or bacon? Would they still be freezable?
Nick
Yea… shouldn’t be a problem.
Ellie
Thanks, Nick, for the great idea. My husband flies out the door every morning and usually forgets to eat breakfast or grabs something really bad.
I’m going to make these egg Nick-muffins right away. I will probably add sausage/canadian bacon to the mix. I don’t think that changes the freezing/reheating method, don’t you think?
Lauren
These look great! I just finished eating one I made using these thin bagels, though I used processed cheese, and the egg was runny cause I wasn’t freezing it. But yum!
I may have to go get me some English muffins though after seeing this. These would be pretty good to bring to school with me, even though we don’t have an oven. (better than vending machine burritos that’s for sure).
Gayle
OMG, if you could reproduce the Taco Bell Chilito at home, I would be in your debt forever!
As for Sonic Cherry Limeade, you would probably be kind of disappointed to know it involves more “lemon-lime soda” (aka Sprite) that limeade. The Simply brand used to have a great version, but I haven’t seen it at the Teeter lately so I but the plain limeade, add some tonic water and slop in some Rose’s grenadine until it’s right. Also plays well with vodka, if you’ve had One of Those Days.
Bill
My weakness – and my gateway to fast-food reverse-engineering – is the Taco Bell Crunch Wrap Supreme.
Justin
How about making a McGriddle next time?
Justin
Actually, I think you should make a McRib. That would be amazing!
Anita
McRibs make me think of the processed meat rib sandwiches that they used to force us to eat in elementary. Bad memories of finding gristle and such.
Amanda
sad as it may be, my husband and I both love the mcrib! we don’t go often but when it’s mcrib time of year and shamrock shake time of year even us grown up like it…. and yes we know it is nasty stuff made with fillers, etc etc. thankfully they are both “seasonal” items!
tishA
The frozen vegetarian BBQ ribs taste just like McRibs.
grace
eggs baked in a muffin tin = stroke of genius. thanks. :)
S’toon Girl
Mmm.. this would have been a way better breakfast this morning then the Cheerios I had! I do make this fairly often but microwave the egg (in a perfect sized ceramic dish I found just for this purpose!) while I toast the muffin. Adding a slice of ham on top of the egg before cooking it is even yummier… and real cheese!! I CANNOT deal with processed cheese, I was raised by hippies and that is just not food. Ick. Your wholesome mass production is very lovely Nick, but then aren’t you tempted to eat 3 or 4 (or 11) though??
Nick
Haha… yea… I had two when I made them, but can usually stick to one at a time other than that. ;)
lo
Way to sell it! You go, Boy!
A good breakfast sammich is a thing of beauty. And the great thing is, they take almost no time at all to throw together. Thanks for showing the world how wrong they are about fast food :)
Queen of Quirky
I second the crunch wrap supreme, but I’d want it to feature ground turkey v. ground beef. (Wow, I’m a picky pants.)
Or the spicy chicken from Wendy’s. I love that one!
Nick
Wow… haha. Lots of favorite fast foods here ;) I’ll see what I can do.
Jeff
Cool idea. I make nearly the same sandwich one at a time for a quick breakfast. It takes about 5 minutes altogether–it definitely takes less time than going to McDonalds, and it’s so much better (mainly because of the cheese).
Jennifer
I love your idea of making fast food at home and healthier. I was telling my mom about some of your recipes and how you're doing this challenge, and she immediately said "Wendy's chili!" So, I would like to submit that as an idea for your consideration :).
Paul
I just made these over the weekend. (I am a little behind I know but I am new to the site) They were great. I added some back bacon and smoked cheddar which proved to be a great decision. One is warming up in the oven right now. Thanks for the great site. I look forward to trying many of the recipes on here.
Nick
Good tip on reheating. Thanks and welcome to the site :)
Andrea
Nine ingredients in the muffins, I checked, so well under the 55 in the Egg McMuffin if you're using those, egg, cheese, butter/olive oil.
Kimberly
Yum! This looks great. I'll be baking English muffins this week. That should make it even better–and cheaper. Great tips and ideas. Thanks for sharing.
My recent post farm pictures
kimberly
for those freaking on the health part–use all egg whites and less cheese & make your own muffins from scratch.
My recent post morning coffee
Jen
I found these on Pinterest and used the photo on my blog. I am a now a follower of your blog and will definitely use your name in place of {source} next time :) Thank you for sharing such a great recipe!
My recent post New Recipes
Keely Dennis
This is great! We make egg muffins at home a lot, I never thought of the muffin tin- I'm going to tell my hubby about that.
Melissa Barham
Brilliant! I came across this recipe on pinterest and pinned it myself. Just came back this AM and made a version but with biscuits because that is what I had on hand. Complete hit and the muffin pan is just genius! Thanks so much for sharing!
Lori
I am sure someone may have mentioned this in your many comments, but as far as cost goes I think you are ahead. If you allowed your child to order a drink for each of those meals, the cost would add up quickly. Not to mention you took one trip the grocery store to make all those sandwiches. You saved several trips worth of gas going to a fast food place for them. I can't wait to try this recipe! Thanks for sharing your mad cooking skills!!
ldh
Stopping by for the first time and just love this post. I make meals for my mom that she can easily reheat. I think she would love these. I look forward to making a batch.
Kindly, Lorraine
My recent post Happy Cambrie
Diane
Great post, I usually bake separate eggs in glass or ceramic bowls, LOVE this idea!!!
Sara Grace
Couldn't you make reheating these much faster if you simply didn't freeze the muffin? Make the eggs and freeze them. Maybe even grate your cheese ahead, if you like, or slice the cheese if you don't want to deal with a grater in the morning. It would only take you five or ten minutes to toast your muffin and you could defrost the egg in the microwave. I really think you could pare back the morning prep time.
Maybe microwaving the egg would make it gummy?
Tower Deli
Serving sandwiches for breakfast or catering Fort Lauderdale can be fun because of all the varieties that you can make. Depending on you and your guests' preference of ingredients, you can create a colorful and delicious sandwich that everyone will love!
Her Royal Highness
Okay, so I didn't read through all the posts and I'm sure somebody else probably said it, but I'm going to say it anyway… you could even take this up a notch by scrambling your eggs in each tin and adding some chopped green onions, mushrooms, bell peppers – anything that you like.
I just showed this post to my husband and he ran to the kitchen and is now barking out questions to me about how to make them. I suppose I should take my computer to him…
Thanks fot the tip! I LOVE this!!!
My recent post Totally Awesome!!!
Katie
can't wait to try these! My husband always needs a quick meal in the morning. With dollar store english muffins and couponing the eggs and cheese, I think I could make a batch of 12 for $6! think i will use sliced american cheese rather than grating. the kids will love these too! thanks!
Sars
I bet these would heat even more quickly in a toaster oven set to 325 (for those of us who are not so much of the morning folks). Also, they may cost more up front, but you save $$ on not buying the large soda and the hash browns you would probably get along with it. Thanks for the tips!
Mom
Make a batch for a quick breakfast on busy mornings.
Rebecca
Wow!! I never would have thought of making up a “batch” of these and freezing them. I followed a link from MoneySavingMom.com and you had me craving one of these–I’m 4 months pregnant so I’m blaming it on the baby. :) Anyway, I’ve never been a big fan of McD’s, so I wasn’t about to run out and get an Egg McMuffin from them, not to mention it’s 9PM and they don’t sell them now anyway. Well the bread store is closed, but I had a bagel in my fridge, so I scrambled two eggs, mixed in some cheese, toasted the bagel and, after sharing half with my hubby, had a close substitute. One that will do anyway until I can get to the bread store tomorrow to get some English muffins for the real thing. I’m definitely going to try freezing these as I’m not awake enough in the morning to try to make these in time for my husband to have breakfast before he leaves for work. As long as I remember to put them in the oven when we first get up so they’re hot when he’s ready to eat we’ll be good to go. Thanks for a great idea.
joyce
we've been making something similar to this for many many years. actually, i remember my mom making them for supper sometimes when i was younger. we just fried the eggs in a frying pan, smooshing them after flipping so the egg yolk got completely cooked, and putting a slice of canadian bacon in with them. absolutely delicious!! my husband makes one almost every night before work the next morning. he toasts the english muffin, fries the egg with some salt and pepper in the frying pan, then puts ketchup on his muffin after it is toasted. he doesn't put cheese on when he's making them the night before, but puts some chipped or sliced ham in. he wraps and refrigerates it at night, then he reheats it in the morning in the microwave.
Audra
You could make your own english muffins and save even more. This recipe is easy! It calls for all purpose flour but you can make a whole wheat version by replacing some or all of it. Enjoy! http://allrecipes.com/recipe/english-muffins/deta…
Nick
Yep! This is the recipe I've had a lot of success with: https://www.crunchtimekitchen.com/2009/05/english-muffins/
Kaui
LOVE this recipe and can't WAIT to try it myself. We're an all organic eating family so getting this at McDonalds would've been an absolute no no for us. But now that I know how to make it I can just grab the organic ingredients I want and have a healthy (and yummy) breakfast!
THANKS!!!
My recent post Thursday Blog Hops
Amy
Great idea! I waited till Thomas English muffins were BOGO at Publix so I spent $4 for 12 English muffins, $1.79 for 1 dozen eggs and about $1.50 for the necessary cheese, so 12 muffins for less than $7.50.
Deb "DJ" Porter
guess I'll be the one to ask the silly question :/ do you reheat these in the oven in the foil? or on a cookie sheet ?? Just curious since I rarely freeze things and thought this would be a good thing to try.
Mary
Great idea, but I have to say my oven reheated sandwich was not very good compared to the fresh one I ate when I first made them. It took forever to heat up and then the yoke was still cold and the whites were rubbery. Maybe if I cooked the eggs less in the first step for next time, but I'm not sure reheated eggs are all that tasty. Would make a nice breakfast for a crowd though.
Cindy
Saw your fabulous egg cooking idea on pinterest, and applied it to my eggs Benedict! I always have to make at least 15 for our family, (of which 3 are hungry men-1 who plays highscool football and can eat!)It made it so easy making the eggs in the oven! They cooked while my English muffins toasted in the oven at the same time!
I’m making your egg sandwiches for the freezer next for my guys!
Thanks so much!
Beth
Just made these but added Canadian bacon to them. Hopefully this will be the end of my drive thru breakfast!
Angie
Just want to say a huge "THANKS!" for this great idea! I'm making my 2nd batch of a dozen, then freezing for my husband to eat for breakfast . . he leaves for work at 6:45 and I've always wanted to be the kind of wife who cooks for her man before sending him off into the world .. but, well, you know.
Anyway – now he thinks I'm the best wife in the world and actually thanks me every day for making these for him!
Missy
I pinned this on pinterest a while back and now I'm doing it this morning. I'm so excited to see how they turn out. Thanks for the share!
My recent post Silent Auction
Andrea
I would make and freeze only the egg, reheat just the egg at 50% for a minute at a time until hot while toasting a fresh english muffin. Slap the egg and a slice of cheese on the fresh toasted english muffin and voila… done in just a few minutes.
To freeze for later convenience: I would lay the cooked eggs on a parchment lined cookie sheet until frozen then just shove them in a freezer bag or container for easy grabbing in the morning.
Also, an egg and cheese mcmuffin with no meat is $2.49 at my local McD's.
Amy
I've made these a few times now and my kids love them! We have been playing around with microwaving them, and it DOES work, and pretty successfully, we find. What has worked for us is microwaving on defrost for 3min and then removing the egg and microwaving JUST the egg for about 10sec. Obviously, microwaves differ, but defrost seems to be the way to go. Thanks for a great recipe!
nfoste2245
TOTALLY trying this, with Canadian Bacon! Thanks. And Pinned it as well.
The Kidless Kronicles
Kit
I bought a microwave egg cooker (holds two) for about $2.50 at the grocery store and make something similar every morning. My kiddos just like the egg; no cheese, no meat… (gotta love easy-pleasers). Anyway, while I'm toasting the english muffins (which, while not organic, I can get for only $1/6 at our local Albertson's) I nuke the eggs, butter the muffins, then hand them out with a paper towel to each kid as we head out the door. I don't think it takes more than 10 mins to make 4 of them!
julie
thanks for this idea! i made them for a work breakfast for 36 today. cooked the eggs and muffins last night, assembled and bagged them all today, let everyone microwave their own. for the groceries to make these i was under $40 for our whole crew and i know if i picked up fast food, i would have been over $50. sure it look a little bit of time, but everyone said they were better than the fast food version.
Emily
Thank you! yummmmmmmmm
Collette
I came across your recipe last night and knew immediately what I wanted to make for my kids and their sleepover guests for breakfast. So, this morning I got everything going – umm, super easy…took maybe 3 minutes to get everything together and start cooking, the oven took longer to heat up than to prep! I followed your directions, and while it was cooking, i got to get my vacumming done — it was so refreshing not to have to spend another meal standing over the stove the whole time, I got my chores done – an extra plus!! Well, the results were amazing! These were way better then McD’s, and for a house of kids to say so, that really means something. Tis recipe is going into my arsenal forever, thank you so much for sharing!!
Sara
Can you do these with scrambling the egg and then baking it after that???
Nick
Sure! Shouldn't be a problem at all.
wendy
I scramble mine in advance in the bottom of a measuring cup in the micro, or scramble a “sheet” of eggs and use a bisquit cutter. Putting frozen round sausage patties into the sandwich gives them a lot of flavor when they reheat.
Emily
Not sure if someone already commented this, but Egg McMuffins from McDs are actually almost $3 each (when they are not on special, like buy one get one).
Rae
I do not know if anyone has said this before, as I don’t have time to read over 100 comments. But we tried this today and it works with Egg Beaters. (1/4 cup=1 egg.)
barb
We make an individual version of these breakfast sanwiches and cook the egg in a coffee mug in the microwave! We wipe the inside of the mug with a little oil, break the yolk ( or it will explode), and cook for about 20 – 40 seconds until egg is done. Then add to toasted English muffin with cheese and Canadian Bacon if desired.
Jenelle
Made these a week ago and froze them. I am now having a hard time reheating them in the oven. The egg and sausage (I added a turkey sausage patty for some protein.) would be cold and the muffin would be a little to toasted. So I took the directions off the Jimmy Dean breakfast sandwiches and microwaved one. It worked great. Wrap in a paper-towel cook 1:30 minutes on defrost then flip and cook 1minute on high. The egg and sausage was fully cooked and the muffin was nice and soft. Yummy!!!
Kate
Thanks so much for this recipe! I have made them twice now. I bought English muffins for .89 a package at the hostess bread outlet. I added sausage as I got that for $1/12 oz roll. So yummy!
Jackie Blackmon
I am trying this today, is it okay to cook the eggs, freeze and add the cheese, meat, etc. later? I love this idea. Great to make for my husband and I, or to make in advance for company. what a great idea!!!!
Nick
Sure, but that doesn’t really save you that much time. The eggs take just as long to cook as the meat so you could just cook them at the same time later on.
The real time savings comes from making the whole sandwich and freezing it.
Good luck!
vicky bell
I’m just wondering about the cost of heating an oven to 350 degrees for 25 minutes for one breakfast sandwich. My oven is electric, and I try to use it as little as possible. In the interest of saving energy I wonder if defrosting it first would make it quick to warm up in a pan instead? Anyone else have ideas about faster/less energy ways to warm these sandwiches up- without resorting to the microwave? Otherwise, I’d deal with a soggy muffin…
Kenda
Andrea posted a good solution on 9/21: Prepare and freeze just the cooked egg, and instead of baking the whole sandwich in the oven, nuke the egg and toast a “fresh” muffin, slap ’em together and go!
saucyblondie
Thanks, Mama, for a great recipe! I make these when we are camping but never thought of making them at home and freezing! Awesome!
Loved that you didn’t use “plastic cheese” as my kids call it. ;-)
When camping, I also give the kids the option of adding red onion slices, olives, tomatoes, lettuce…and they do!
btw, if you buy the day old muffins at McGavins, you can get 6 for $1. You can get whole wheat, sour dough, etc.
Nick
I’m so far from a Mama it’s not even funny, but thanks for the comment! :)
Glad you liked them.
Claude
Oh my, I didn’t know you could freeze these! Thanks for the tip!
Liba
I just made a batch of these, but with home made English muffins. It was cheap and easy! http://allrecipes.com/Recipe-Tools/Print/Recipe.aspx?RecipeID=121541&origin=detail&&Servings=36 This way there are no stabilizers or additives at all and all of the ingredients are ones I am happy with. The English muffins can easily be made whole wheat (I do half and half) and the eggs and muffins can be baked at the same time.
Andrea
i didn’t read your other comments but i was thinking about how to reheat them quickly…couldn’t you just freeze the egg?? then all you’d have to do is reheat the egg in the micro while the english muffin is in the toaster. You could always keep the english muffins in a bag in the freezer next to the eggs to make sure you have some on hand.
Nick
I think that would work great Andrea!
Good luck!
Sarah
Brilliant! I’m a huge breakfast sandwich fan, so I cannot wait to try this out!
Maranda
I make mini quiche in muffin tins, and then we reheat those in the microwave while toasting an english muffin at the same time. Only takes about 3 minutes to put together. I put some finely chopped spinach in the mix and top them with cheese. A great breakfast for the kids!
I can get eggs on sale for $1.99 and whole wheat english muffins for less than $4/doz so it’s a pretty inexpensive breakfast or lunch for the kids (pop it in a wide mouth thermos for their lunch).
I am all about the muffin tin cooking. Perfect portion sizes and it’s easy!
JAK
An egg has 4 g of saturated fat.
Nick
A large Egg has 4-5g of fat. Only 1.5-2g are saturated.
http://nutritiondata.self.com/facts/dairy-and-egg-products/111/2
Blanca @ Mi Vidaa – Blanca
I’m guessing you could scramble these, right? Would they take the same amount of time?
Jodi
I scramble one egg at a time for one minute in the microwave.
Tammy
Try thawing the sandwich out over night first and then try microwaving it. Might not get as soggy that way. Just FYI.
Legally Delish
I love this idea! – It never occurred to me to bake the eggs in a muffin tin. Perfect for having a lot of overnight guests over the holidays too!
Thanks for posting.
angela
brilliant & delicious! plus, a great way to use more eggs from our backyard flock. thanks!
Rose-Ellen
The best way to reheat these is in a panini (sandwich) press. Gets them toasty and melty. You can also use a toaster oven, or thaw a minute in the microwave then turn your toaster on its side and slip in the sandwich for a crispy crust. Love the idea to use a muffin tin- so much faster than doing 1 or 2 at a time on the stove. Bet you could use a jumbo muffin tin to get an egg that’s a better size for the muffin. Thanks for this!!
Tricia
The trick to reheating muffins like these in the microwave is to wrap them in a paper towel. It works well. I have been happily eating these almost every day lately and what works on my microwave is:
1. Take frozen muffin out of plastic and wrap in paper towel.
2. Microwave for 1 minute on 30% power.
3. Microwave for 1 minute full power.
Bella
I made these tonight and they were so yummy!! So thrilled that I found your blog and this great recipe/how to. Thanks!! :)
Here is the link to the post, I linked back to you giving you the credit for the how to. :)
http://createbellacreate.wordpress.com/2011/12/01/homemade-egg-mcmuffin/
Eileen
I also plan on making these, I was actually planning on putting it up on my blog with my own tips also. I will also credit you.
I was thinking of making 6 whole wheat and 6 plain.
When I make Bacon, I make the pound, put it in on a jelly roll pan (sprayed with non stock spray) the oven on 450 for about 20 minutes, and freeze the rest for quick Bacon anytime.
I am always running out of the house on my way to work, and we have an industrial toaster, so, throwing this in my bag on my way out the door, and having them ready for my son and my boyfriend is great because keeping them plain lets them leave it be, or I can see my son cooking up some sausage or adding Bacon. I find foil to be preferable because you can recycle it, and you can use it to heat the muffins the way you prefer.
Tesia
I can scramble the eggs and bake them too, right?
CJ
I’ve often made my own McD’s-style breakfast sandwiches at home. I like the idea of making the eggs in a muffin pan!! Also, in fairness (and I’m NOT saying the McDonald’s version is a simple, fresh option!) the at-home version has more than 5 ingredients too… english muffins and cheese both contain more than 1 ingredient!
DeniseInArk
Love this. Here are a few ideas that popped up while reading this: 1) up the gourmet factor by baking a quiche filling in the muffin pan instead of just the eggs. 2) Oil the muffin pan with bacon grease for a little bacon flavor with the same fat. 3) Use very lean meat varieties and put them in the bottom of the cups before you break the eggs. 3-4 mornings a week one, the other, or both of us is out the door by 4:30-5:30 AM. This is just the thing to haul out with us.
Kristen
Try adding a small layer of Bacon Jam, found this recipe the other day and added to the sandwiches this morning and YUMMMMMMMMMM!
http://tideandthyme.com/index.php?s=bacon
Lanie
This is such a great idea. I couldn’t wait to make these myself! I tried it out and added some prosciutto to the sandwiches. MMMmmm they are the perfect on the go breakfast before work. I featured them in my blog with credit to you! Please check it out! Thanks! http://fromgardenstatetogoldenstate.wordpress.com/2011/12/07/eggtastic-sandwiches/
Sandi
FYI…I was curious about the cost of an egg muffin and a search revealed the price to be anywhere from $1.32 (location not disclosed) to $3.29 in CA. So, in terms of economics, not to mention convenience, taste and health, homemade is better on all counts. Thanks for the idea!
Virginia
I was going to say, Egg Mc Muffins (with Ham) are over $3 here… so this is much more economical.
Brandy Anderson
I’m fixing these for my family tonight! :) I’m also adding Canadian bacon. If I like them I plan to make a whole bunch to freeze for when I have my 2nd baby (due in 8 weeks)
Sharon
I’ve been wanting to make these at home for years, but thought I needed a special contraption to cook the eggs in. Muffin tins? I love it! I have those! My favorite breakfast sandwich of theirs is the Sausage, Egg, McMuffin. Might try to make that. I don’t know for sure how much one sandwich costs at my local McD’s, but I’m sure it’s well over $2.
Barbara Platt
http://barbarasbeat.blogspot.com/2012/01/dadtrepreneur-cook-of-day-breakfast.html
karen M
Love this idea, with a family of 7, it sure does save me time making a bigger batch then the old 2 slice toaster and doing them 1 at a time.. Thank YOU!
Sarah
Another reason this will be better (and probably another reason they work out a little more expensive) is that you can use free range & organic eggs!
Mandy Cat
I can’t believe I’ve never thought of doing eggs in a muffin pan. I discarded the idea of serving corned beef hash with eggs on top when I was planning a brunch because the thought of poaching 18 eggs was so daunting.
I’ve been wondering if I should purchase a smaller muffin pan to fit in my toaster oven just for every day breakfasts. Now I know — yes.
mindy
we love to make egg mcmuffins at home. might I suggest sour dough roll in place of english muffins. socks… off! ;)
Michelle Markus
best comment ever.
Angel
Just made these for my son-in-law. He said they are delicious! Will make them for the men at church on their next work day.
Gretchen
This is such a great idea! I have a 15-yr-old soccer player who is constantly hungry, and this will be a great thing to have in the freezer. Thanks!
Dianna
Just wondered if you have any ideas – how many calories per sandwich?
Carrie
Tried these today. It really is a great idea to cook the eggs that way. I scrambled them before cooking b/c I thought it would be better that way if the yolks were not going to be soft anyway. This would be a great way to make eggs with a soft center for eggs benedict, etc.
Erin w
The egg doesn’t reheat well. We took from freezer and warmed in toaster oven, egg was still frozen. Had to microwave just the egg for over a minute. Then, the whole thing was disappointingly chewy and blech. We won’t be doing this again.
Nick
Erin, I reheat them in the oven while I’m getting ready for work. It takes about 20-25 minutes, but works great. Just wrap them in foil and stick them in a 350 degree oven.
Gingerbread Latte
What about freezing the eggs separately? Heating only the egg, then just popping them into the muffin. That might work and still be fast and simple.
Maomao
I’m not sure I get what the point of this is. It would take less time to make one every day than to heat it up for 25 min in the oven from freezing :/
Nick
Time wise that’s true, but the point is that you don’t have to be actively cooking anything while they are reheating in the oven.
I toss mine in, go take a shower, get ready for work, and then my breakfast is ready to go.
Jen @ Canadian Rhapsody
To make things quicker in the morning, why not just microwave the egg while toasting the bun, grating cheese, etc.
A standard sized coffee mug is the PERFECT size. Just oil it and crack in an egg. Cook it according to your microwave’s instructions (I shake on a bit of montreal steak seasoning first).
Alida Lee
I have a question: I made these this morning and when I took the eggs out of the oven there was a thin “crust” on top. It was kind of like a crusty skin. Any idea how to get that not to happen? Or what I did wrong? THANKS!
Leila
GREAT recipe and idea… I have been buying the frozen Jimmy Dean sandwiches and these are MUCH cheaper and just as healthy if not more so due to the turkey sausage etc I am using! Me and my husband’s grumbly morning tummies thank you!
tasha
could you freeze just the eggs?
F Sethman
Yes! I do this all the time. It’s a great way to have eggs when the chickens slow down in the fall:) you wait till they cool and then fresh saver bag them to have them last longer.
Wendy
This is great because I can use gluten free English muffins. I can’t eat the ones from McD even if I wanted to.
Mandy Robinson
I can’t wait to try this next week. Thank you!
Kim
I’ve been trying to lose weight & at just 300 calories, McDonald’s Egg McMuffins are great, but after paying $3.45 for one this morning, I decided to search the web to see about making them myself! Going to try these tomorrow….THANKS!!
Serena
A friend linked this on facebook and I can’t get over how genius it is. I’ve made McMuffins at home in the past, as well as Big Macs, because I figure it’s cheaper and better ingredients. The technique here is brilliant, I’ve been trying to come up with more ways to make breakfast at home for my husband that doesn’t involve me getting up at 5am like he does. This is perfect, he can just pop it in the microwave at work or before he leaves! Thank you!!!
Ronald
I think that you are forgetting the ham, Egg Mcmuffins come with a thin slice of canadian bacon on them. It is done this way to better recreate Eggs Benidict that the egg Mcmuffin is based on (Ray Krocs favorite dish).
wintersundays
Yippee! Made these today for my niece. She is in high school and in her rush out the door doesn’t always have time to prepare breakfast. I added sausage to the muffin tin and then whisked the eggs with a wee bit of baking soda and a 1/4 cup of milk and poured over the sausage. I made a plea for broccoli but my niece wasn’t having it. I used organic eggs which I hope makes it a tad healthier. Used sharp cheddar. Thanks so much!!! One more note, I only had 6 English muffins so she will just microwave the 3 egg/sausage muffins that aren’t in sandwich form.
Melinda
We had these for breakfast-for-dinner last night, and let me tell you they were a hit! My fiance wanted sausage egg mcmuffins so each one had a sausage patty on top as well. Cooking the egg in a muffin tin in the oven is such an awesome idea, I can’t believe I never thought of it before! What a great way to fix a bunch of these without having to stand over the stove all evening. I just started the sausage on top of the stove, put the eggs in the oven, set the timer for 10 minutes, then flipped the sausage, stuck the English muffins in the oven and set the timer for another 10. By the time they were done, the sausage was done too. Perfect! And delicious! I will definitely make these again. Thanks!
Alicia Endl
I made these today for my boyfriends birthday breakfast!! They were a hit. Thanks for sharing
Elle
I can’t believe I never thought of cooking them in the oven like that–in a muffin tin! You’re a genius!
Suzie the Foodie
Thank you so much for this foodie idea! I made some in my skull cupcake tin to add a spooky touch and they came out perfectly!
JEN
What a great idea! I’m making them right now actually! Perfect for breakfast on the go! I’m going to just freeze the egg part as opposed to the bread and cheese. I just figure you can pop it in the toaster and pop the egg on it once its toasted. gonna give it a try anyways!
Nicole Good
Since when did McD’s have their Egg McMuffins for $1?!? Where I live they are just barely less than $2. This is so much cheaper and they do taste so much better! I like a piece of Canadian Bacon or Ham on mine.
Claire from NY
I can’t wait to try this. My kids love these when I make them, but I don’t have a lot of time making them in the morning. Freezing is a great idea, then I can use my nuwave oven to reheat them in the morning. Much faster than the oven :-)
Thanks again for sharing.
Leanne Holm
There are not 55 ingredients in an egg mcmuffin. If you looked at the ingredients on your package of cheese and muffins you have displayed, you may come to the conclusion that your muffins have just as many “ingredients” as the classic sandwich. Before you slander a product, you need to have done your homework.
I have worked there for 14 years and am a restaurant manager. To dispell some of your misinformation, we use all quality products. Take a look at McDonald’s.com to see our commitment to nutrition and the products that we use. We use only the best ingredients. Our classic sandwich has 300 calories. I would bet that yours has more. . .esp with that tiny smear of butter. It is a great product at a great price. . and if you are someone that works, has a family and countless other obligations. . . a stop at a local McDonald’s for a delicious, healthy and quick breakfast is a great option. Good for you to make your own, but I would bet any amount of money that I could make a muffin at my restaurant that would wins hands down on quality and flavor to yours.
Nick
Hi Leanne, thanks for the comment. I do lots of research on McDonald’s products. Trust me… there are a lot of ingredients in a McDonald’s egg mcmuffin including high fructose corn syrup and other unhealthy additives. Even the eggs have multiple ingredients.
http://www.mcdonalds.com/us/en/food/product_nutrition.breakfast.275.egg-mcmuffin.html
I fundamentally disagree that it’s a great product at a great price.
Your sandwich may only have 300 calories but because of all the additives, it also has 1/4 of the recommended daily sodium intake and 85% of the recommended cholesterol.
And yes… I would gladly accept your challenge.
stephanie
Nick is correct on all accounts.
Stephanie Connors
Thank you….the family loved them!
Clairebakescakes
Hi Nick,
Thanks for sharing this. I’m so with you on this one. I personally love the taste of the homemade one. My daughter loves it so much she had 2. She’s super excited to have them for breakfast, since we have a tight schedule in the morning. She said it taste so much better than McDonald’s sandwich, specially the cheese. I also grated the cheese myself and the flavor is so much better than the processed individual cheese.
:-)
Amy
I like to make these for breakfast, but instead I drop a Thomas muffin (100 calories each) into a toaster while I prepare the rest. Spray a small glass bowl with Pam and put 1/4 cup of egg beaters in it. Cook in microwave 30 seconds, turn, and another 30 seconds it is perfect. Add one slice of Kraft fat free sharp cheese and 1 slice Hormel 95% fat free canadian bacon, and you have yourself a fast, wonderful breakfast!
shotaiken
You’ve inspired me to try my hand at a vegan version of these! I’ve never bothered in the past, because I just assumed it would be impossible. I never considered using a muffin tin. You are awesome! <3
Amanda
This may have been addressed in earlier comments, but I confess I have not read through them all. McDonald’s Egg McMuffins also include Canadian bacon, not just egg and cheese as on your version, which might account for the higher sodium levels and, in turn, also make your version even more expensive. If you’re going to do a cost comparison, please compare apples to apples – or in this case, muffin to muffin.
Emily @ Joyful Abode
McDonald’s also doesn’t use organic eggs, and their “cheese” is probably “pasteurized process cheese food” and not actual cheese.
So… apples to apples? I’d rather have homemade any day.
Heather
Exactly!
deb
McDonald’s charges about 2.69 for these and they taste like cardboard. I toast my muffin, add a slice of cheese and Canadian bacon and zap my egg in the microwave for about 30 seconds then assemble. It is thousands of time better than McDonald’s and cheaper to boot.
Nick
Hey Amanda, their website allows you to toggle off ingredients. I made sure to toggle off the bacon before comparing.
Kristen
Actually Amanda, McDonald’s does have Egg McMuffins on their menu that do not include Canadian Bacon, so this recipe is exactly the same. I’m a vegetarian, and was surprised to find out that I could order a meatless version. Thanks Nick for the great recipe and tips! This is so much better than the fast food version!
Aja
McMuffins used to be my mom’s and my “special treat” on Sunday mornings because we couldn’t eat anything else off the menu, being vegetarians.
jj
“Less Sodium. One McDonald’s Egg McMuffin (with no sausage or anything) has 580g of sodium, about 1/4 of what you should be eating every day.”
Before you fly to the defence of the gargantuan chain restaurant with more lawyers than real chickens, Amanda, you should perhaps consider reading the article, in full.
This is a fantastic example of how easy it is to make those fast food classics at home, and with quality ingredients.
Kathryn Blankenship
These english muffin sandwiches are awesome!!! Sooo easy, tastes great! Freezes so well too! We can control the fat and sodium.
We only made 6 but will make more since we know we LOVE them.
Teawench
I’ve been making my own version of the egg mcmuffin for a couple/three years. I use an English muffin mold to make the egg and add whatever chopped veggies I happen to be craving. If I’m making a ton, I just freeze the egg part and toast the muffin while the egg is reheating.
I do like the idea of making these in the muffin tin, though. Would be a heck of a lot faster. Definitely giving this way a try. Thanks for the idea!
jdp
I tried this. I was so paranoid about making sure the eggs were cooked through I cooked them too long and they were a rubbery puck. But at 20 minutes the tops still looked very wet so I thought the middle must be even worse.
Some snowy day I am going to do it one egg at a time instead of wasting 12 and try and figure out the “best” time for my oven and doneness because this was brilliant!
Amanda
that is exactly how mine turned out and I did a dozen also. I am wondering if maybe we used too large of an egg? Mine seemed wet and goopy on top so I let them cook til done but the texture after was of plastic, spongy feeling. maybe if we use a medium egg? it would be less thick and cook thru without the nasty texture. definitely try less next time. I have a dozen cooked eggs sitting in my kitchen wondering what to do with them now. still a good idea, just need to work on our execution lol
Christina
I had the same result and so cooked for longer and now they’re way overcooked. I also baked them from frozen for 20 minutes in my toaster oven without pre-heating and the muffin was hard as a rock. That’ll teach me not to bake these while I’m getting ready!
Thanks for a great recipe; I look forward to making it better next time!
Amanda
Hi! I just made these since I had all the ingredients. I planned on serving some soon when the kids get off the bus for a snack and freezing the rest. my eggs came out rubbery…kinda like a plastic coating on them. anyone else?? Not sure what I did wrong… I mean it’s only a couple simple steps. I had large eggs too so they were thick. I think next time I will scramble with a little milk, add less egg to the tin and do it that way. nice blog, thank you.
Nick
Hey Amanda, yea… it might help to scramble them a bit. Normally rubbery eggs are due to overcooking or high heat. I wonder if maybe your oven is burning a bit on the hot side? Have you tried checking the thermostat with an oven thermometer?
In any event, scrambling them will give you some more leeway for sure. :)
ashley
I do scramble my eggs because i don’t really like the whites and it works good I cook them in the oven for 15min but they seem to rise A LOT so I just cut them in half and it works great but today will be the real test usualy I just make them to eat but today I’m trying a reheated one so we shall see
Tami
I too overcooked my eggs the first time, I’m looking forward to making some more, just without the yoke, I will be cooking the egg white only. They will be eaten in my house much faster. Thanks for the inspiration to make breakfast much easier, healthier and still really tasty. :)
Bev
I pay 2.91 for those at MCD.
Sarah
Haha i know!!!
Donna
Actually, my total cost for 12 was around $6.00. That cmes to 50 cents each. :0)
Arianny
What an awesome idea – about to email the link to a friend who has 3 boys. Thanks for sharing – love finding practical stuff like this.
Aline
I make my bacon in the oven to. Just put the oven on 400, put your bacon on a jelly roll pan and in about 15 minutes you’ll have bacon. I turn it once, pour off the fat and get it to the crispness we like. It might be good to put bacon on this little sandwich, YUM! Thanks for the recipe!
Aline
Christine
Put the bacon on a broiler pan.
Joanne
I line a cookie sheet with foil, put the bacon on a cooling rack and place on cookie sheet. Nice crisp bacon, fat drains right off and easy clean-up!
Robin
Love this! I have 5 grown kids plus there respective mates and this makes breakfast(or after the bar) a snap. Going to add fresh spinach and alittle hollandaise sauce for a brunch! Thanks!
Brenda
As for cooking bacon, I place it on a cooling rack on the cookie sheet. Fat drips off perfectly! Might take a bit longer to cook as it’s not “frying” in the bacon grease but baking.
Beth
I was inspired by your idea made my own mini omelets today. I’m pretty thrilled! I scrambled the eggs and added chopped up onion, green pepper, and ham then some salt and pepper. I will freeze them so my husband can grab them on his way out the door in the mornings. I added some cheese to the top, but next time I will remember to bake it inside too. They’re really fantastic! Thanks!
Jennifer
We make these all the time, but one at a time as desired. I crack an egg into a small bowl, swirl it around a bit to break the yolk, then microwave for 1minute. Meanwhile, pop an English muffin in the toaster. Lay a slice of Canadian bacon and sprinkle some cheese on top of the egg and microwave for a few more seconds. By this time, the toaster has finished and you assemble the parts. Takes just a few minutes and easy enough my teenage son makes them often.
Robin
That is close to what I do. I have a round plastic storage container that is the same size as the English Muffin. Spray butter cooking spray on the bottom, pop in the micro for 1 minute. Stop it at 10 seconds left, add the ham or bacon and finish. Take out and put cheese on top. By this time muffin should be ready from toaster. Assemble and enjoy. If you like all egg cooked, break yoke, if you like the yoke a little runny, leave it alone. Works every time.
Monica
I love this idea! I read some of the comments, and you have to consider “CARRY OVER COOKING TIME”. Since eggs are easy to over cook, it seems to me that while they’re cooling they are still cooking. I’m going to try this asap.
Myrinda
what I really LOVE about this is that you are NOT meaning for them to be reheated in the microwave! Mine broke over the summer and I made a choice to not replace it. We use a toaster oven for reheating now…
Tracey
I am not sure if it has been posted or not as I have not had time to read all the comments…but I used to work at McDonalds and egg mcmuffins are more along the $2.50 range…So that would make this way cheaper and if you use less expensive products, still making it healthier, it would be even cheaper! Thanks for the idea!
Lydia
What about for us folks at high altitude? What changes, if any, would we need to make?
Kayla
I made these, and froze them and when I put them in the oven to reheat, the muffin was hard as a rock! So disappointed! :(
Kristie
I’ve made these in the past, but went through the laborious process of cooking each egg individually in a pan, which was awful. Just made them again but jumped off your idea of a muffin tin with a muffin top pan. It worked great! The circumferance of the muffin tin seemed to me to be a bit on the small side compared to the english muffin, but the muffin top pan was the perfect size to make the egg fit the muffin. I did scramble the egg because that’s the way I like them and so I wouldn’t have to worry about uneven cooking. Great post!
Kara
I love this idea so much! I featured a link to this post in my roundup of freezer breakfast meals. Thanks!
http://www.nestcandy.com/2012/02/make-ahead-freezer-breakfast-meals.html
Lynn
We love these sandwiches. I have a whoopie pie pan that I bake the eggs in so that they are thinner and bigger- more the size of the english muffin. The only problem I am having is that the eggs are sticking to the shallow non-stick metal pan that I have sprayed with a cooking oil spray. I would think that they would slip right out. Does anyone else have trouble with that? I would welcome suggestions on how to remedy that.
Jennifer
I did butter and the eggs came out fine once I ran the dull side of a knife around the edge. Try butter next time.
Christina
I used cooking spray and a silicone spoonula and they came out perfectly!
Jennifer
Did this last night and should have read the comments first. My eggs turned out rubbery at 15 minutes too and my oven is set perfectly at 350* and has a thermometer in there to gauge it so I know it’s accurate. I would recommend 8 minutes and check them.
HOWEVER my BIG problem now is cleaning my muffin pan. It’s a black non-stick one and I coated it in butter first but it will not come clean short of scraping it with a knife or my fingernail (gross) and I soaked it over night even. HELP! I’m about to throw it out.
Nick
Hmm… not sure on that Jennifer. The eggs really shouldn’t stick. I might try a different pan. Also, are you using butter or margarine? Margarine won’t work as well in my experience.
Some people have had success with pam or something also.
Good luck!
PS. I’m going to adjust the recipe a bit to account for the comments on cooking time.
Jennifer
I did use butter (it makes everything in life better right? lol). I will look up a few cleaning methods online and see if I can save it.
Recipe was yummy regardless! My husband and kids devoured them and I will make again.
Another comment….I also thought cooking the english muffins in the oven dried them out too much. So I will either toast them in a traditional toaster or try broiling them for 2-3 minutes next time.
Thank you for publishing such a time saver. I had dinner out in about 30 minutes last night which was a record!
Nick
No problem! You might also be interested in my Quick and Easy meals section…
https://www.crunchtimekitchen.com/category/recipes/quick-easy/
I have lots of under 30 minute meals in that section of the site. :)
Sarah
i love making these!!!!
they are so easy…I used bacon with
mine….besides bacon mekes everything good!!!!
everyone should try these!!!!
Sarah
Carol T.
Thought this was very clever. Need a “fast breakfast for everyone” at the beach this summer. Will definitely try this one!!!! Thank you!!!!
Susie
I am so going to do this at my Gran Camp this summer! Thanks!
S Evans
I made these tonight w/ the idea of freezing them for later. I live in a house full of men…needless to say, it was dinner. Easy to assemble and hit the spot. Thanks!
B C EDWARDS
I do mine in the microwave and generally do them at work…I have a round plastic container thats got a snap on lid and I just toss them in for 23 seconds, toast my english muffin and when the eggs done I toss a half slice of cheese on the egg and then onto the muffin
Katie
This would be really great to do with egg whites!!! I shared this with my Crossfit Box! Thank you!
FlonkertonChamp
i’m having a lot of trouble re-heating these after freezing them. i tried in the microwave, and all i got was lava-hot, soggy muffin and still-frozen egg. i tossed that one and then tried the oven method. the muffin burned and the egg was still partially frozen. any other suggestions?
it worked well for immediate consumption, but i feel like i wasted 5 other eggs and muffins.
Nick
Heya! When you reheat them in the oven, keep them wrapped in foil. That will keep the moisture in and make sure they reheat slowly. it takes a bit longer but the end product is great.
Ginger
You could also try taking one out of the freezer the night before and putting it in the refrigerator so you don’t have to warm as long. Just a thought.
Joy
Destroyed my muffin tin. Not at all what I was hoping for!
Joy
Oh, and I used butter, like you said. I also followed the other instructions exactly.
Nick
Hey Joy, sorry to hear that! What kind of muffin tin were you using?
Also, if you soak the muffin tin in hot water with a bit of soap, it should loosen after an hour or so. You should be able to clean it.
Good luck!
Amy
Hey Nick!
Awesome idea….instead of McD’s I LOOOOVE Dunkin Donuts Egg Whites Veggie Flatbread which cost significantly more than the McMuffin. Any suggestions for using Eggbeaters and chopped veggies and doing something similar to this? Cooking temp/time?
Thanks!
Nick
Hey Amy, I would saute the veggies quickly, then add the eggbeaters to muffin tins (be sure to oil the tins). They will probably need around 15 minutes to cook through.
Then remove each egg and slice it in half so it lays flat. Pop that on your flatbread with the sauteed veggies and some cheese and you’re all set. :)
Michelle
You forgot the meat! Gotta have a slice of ham or bacon. Plus, they taste really good dipped in maple syrup as you eat them.
Nana
The best way to add pepper and/or hot sauce is to add it to the raw egg and let it cook into it. Works wonderfully, with no mess.
Donna
Actually, the total cost is about $6.00 for twelve. That comes to about 50 cents each. May be a little more or less depending on where and how you shop. Anyway still better for you and you don’t have to spend the money for gas to get there. Thanks for the post! :0)
Jennifer
I haven’t tried this… yet! Great idea. McDonald’s also pops the yolk when making the eggs for the McMuffin. They just stick the spatula in the ring and give it a quarter turn. Their eggs are poached. I wonder if you were to put a pan of water in the oven, it would make it steamy enough to perhaps be less rubbery? I don’t know, just a guess.
Jeananne Lybbert
This is awesome! I having been thinking the same thought-why not make it at home? Especially when one Egg McMuffin is almost $3!
Jordana Friedrichs
I wonder how long you would cook them in the oven if you want a runny egg?
Nick
Heya, so if you wanted them still runny in the oven, I would check them around 10 minutes, but it depends on the size of your eggs really.
If you’re freezing them though, it’s pretty much impossible to do a runny egg because after freezing and reheating, it’ll be gross.
If you want to eat immediately though, you can do it.
Shareen
This was so delicious and easy! I don’t have a creative bone in my body and the eggs in the muffin pan was a wonderful idea. I wish I could post a picture of the finished product, you’d be so proud. Thanks for the wonderful idea!
Jo
I’m sure someone has posted this already, but I thought I’d share it anyhow. If you *don’t* want to make a huge batch (no room in the freezer, only egg-eater in the house, etc.) you can use the ring lid to a canning jar to shape the egg in a griddle or frying pan. Spray the ring with cooking spray, put it lip-down on the (sprayed or buttered) griddle, and crack the egg in it. A friend of mine use to make these this way all the time.
And thanks for the price breakdown, and the … 55 ingredients? I’ve avoided McD’s for a long time, but I still occasionally break down and buy a sandwich at DD. I’m sure I could make something like this ahead of time for myself and avoid paying $3 for a sandwich with fake egg that I just take off anyway.
Jessica
What is the point of this if you have to heat it in the oven for 20 mins anyway? lol seems kind of a waste of time. just make it fresh, eggs are not hard! pop in english muffins in the toaster while cooking and you will be done in less than 20 mins..
Nick
Right yea… it depends on schedule. For me it saves time because I can pop it in the oven, hop in the shower or whatever, get ready, and then breakfast is ready.
Theresa
i have never liked muffins – not my choice , but i do love homemade biscuits. I just wonder how this would work if you use biscuits ?
Nick
It should work great! Good luck!
Amy Hegewald
Wow, thank you for this! And I appreciate your philosophy. Families (and individuals) need to learn that cooking at home is such a healthier and usually cheaper way to live. While your “McMuffins” are a bit more expensive than McDonalds’ version, just imagine the health effects of eating McDonalds’ McMuffins: high choloesterol, fatty fatty fatty, and a whole mess of chemicals to make the “making” of these fast for each franchise. With all this crud added to the “food,” your version takes better care of us, therefore less negative health issues. Again, thanks for the yummy, healthy, and FAST alternative! :)
Heather
These sound great & I love make ahead meals that save time. However, they take longer to reheat than they do to make. I’m not sure I see a good reason to make so many ahead of time just to freeze them. You’re not saving any time and the convenience is extremely minimal. I do however think this is a fantastic idea for a large (or small) family to get everyone out the door in a reasonable amount of time with very little clean up. In today’s fast pace lifestyles sometimes we need healthy food for on-the-go and I think this fits the bill. Well done!
Linda Crow
I’ve been making eggs for the English Muffin sandwich in the microwave. I put my muffin in the toaster. I put my egg in a small shallow pyrex bowl, adding approximately 1/2 tsp water, and stir a few times with a fork. Place the egg in the microwave and zap for about 20 seconds. If it isn’t quiet done enough, I’ll add another 2-3 seconds. The egg is a perfect fit for the muffin.
nicole
Thank you so much for the fabulous idea! I can’t wait to try them.
However, when you were listing the 55 ingredients, I am pretty a lot of those could be the ingredients in the muffins themselves, which you would have to account for in your version as well. They cannot just list “egg mcmuffin”. Same goes for the cheese….even your cheese has ingredients. Just trying to keep it real folks. But I digress, it is still a great recipe and I thank you for sharing.
judy
The egg muffins look delicious and I will make them, never thought of doing eggs in a muffin tin. Thank you!!
Jenn (@ciaofraz)
Tillamook is one of my all time favorite cheese yummies. I love the muffin tin idea…prepping for a rather large Easter brunch for a large crowd and was wondering the best way to pull off the eggs benedict…you are a life saver!
Amanda Andrus
I am made these just today and am eating one right now. This is so good and such a great idea to cook the eggs this way. The eggs turned out great. I added canadian bacon to some of them. I think next time that I might scramble the eggs and add some veggies. Thanks so much for this recipe.
Jen
Great idea on the eggs in a muffin tin. My take on this is to freeze ham and egg discs and and keep some english muffins and cheese in the house (perhaps muffins even in the freezer), toast the muffin, nuke the egg and ham and throw it together all hot ingredients with a slice of cheddar form the fridge and it will melt. I can manage that in the morning…cooking eggs for reheating for 25 minutes prob not.
Jessica
What are your directions to reheating frozen ones? Thanks
lori
I do this too, but I freeze them without the cheese. We only have time for microwaving around here. I remove the egg from the muffin, microwave for 30 seconds, put back in muffin with a fresh slice of cheese and microwave all for 30 – 40 more seconds. No mushy muffin!
Melissa
Thank you for this genious recipe!! My kids love eggs over easy, this is the perfect solution!! Thank you again!!
Lisa
What a great idea! We do something similar in our house. I have a glass dish with a base the same size as an english muffin. I beat an egg and microwave it for 1:20 on lv 6, slide out onto a toasted english muffin and top with cheese. My husband can make a mcmuffin in 4 minutes. He especially likes it when i have some cooked bacon in a plastic bag in the fridge. Bacon and Egg McMuffin!
Glo
wheres the canadian bacon that Micky D uses? I make my won bkfst sands also, I use butter flavored biscuits(grands, but western family is better) add ham; u can use anything in them easy to make & great to eat!
Shannon @ RecipesMe
These look so good. Great way to cook the eggs :)
Lori M
Yes like Glo said..the original egg Mcmuffin has canadian bacon on it..which is very lean. And, if u are watching your sodium and i am sure u can find a low sodium version. Otherwise, to me this is just a breakfast sandwich and not a Mickey D’s re-make of their Egg Mc Muffin.
I will definitely try these but adding: canadian bacon, turkey bacon, or turkey sausage! Thanks for posting!
vanessa
Just so you know, mcdonalds egg mcmuffins are actually 2.50 a sandwich here on the east coast! so in reality, we are saving with this recipe!!
Diana
Yep, that’s right. It’s only the sausage mcmuffin (no egg), that is a $1
Jordan
Here on the west coast they are 2.50 without bacon.
DaniJo
Here in Missouri they are $2.99.
PATEE
I have been making these too, but haven’t tried freezing them but I will now. I am on WW so these fit in my program just fine, I use a light cheese. I used to go to McD’s and actually I think it is quicker to make them at home, considering the long line when I am in a rush to get to work. Thanks for sharing your tips
Tina
Patee, Im on WW too….could you share how many pp this is?
Kristin
The points is really going to depend on the ingredients you are using. I’m using orowheat double fiber english muffins (3pp) 1 egg (2pp) and 1 slice 2% provolone cheese (2pp) for a grand total of 7pp. Add a nice fresh piece of fruit to this and it makes a great WW friendly breakfast.
mm81
If you count all the ingredients in the english muffins that you bought and in the cheese and butter I’m sure you would be close to that 55 ingredient mark.
mm81
or at least more than 3
mariann
how would BUTTER and EGGS be any more ingredients? Maybe the english muffin, I could see…a few more..not eggs or butter tho lol
Jordan
you also forgot cheese which probably has at least 10 or so unto itself.
Cheryl
I came across this from moneysavingmom.com. I posted about my own version of this sandwich not too long ago. I felt so excited when I found out about cooking eggs in the oven. I didn’t consider the cost breakdown too much because I was making these sandwiches primarily because I got some discounted English Muffins and eggs–sounded like a winning Breakfast-for-dinner meal.
Thank you for your tips about freezing and reheating.
Nick
You’re welcome Cheryl! Thanks for swinging by Macheesmo. :)
Sasha
Egg McMuffins are about $3 apiece at McDonalds these days so this idea is MUCH more cost effective. I love the idea and will be doing it for breakfast in the morning.
Tanya
I actually prefer the egg and cheese biscuit. Think I could substitute the McMuffin with a biscuit and it would still freeze as well? Looks delicious! McMuffin or biscuit I will be trying for breakfast soon!
Sam
I make my own homemade bagels. I’m thinking: 1. Yum! 2. Might be even more cost efficient with my $0.20/each bagels; and 3. Super fast breakfast = more time to do my hair before work :D
Christy
I hope it’s okay that I shared your recipe on Pinterest! Myself and a few friends are all expecting our first little ones this summer and are trying to get freezable meal ideas so we don’t starve with all the breastfeeding!
Nick
Why of course! :) You can share ALL of my recipes on Pinterest.
Julie
Has anyone tried this with egg beaters or egg white beaters?
Nick
Should work fine Julie! You might not need to bake them quite as long. You can also add spinach or veggies… check out my updated version:
https://www.crunchtimekitchen.com/2012/04/breakfast-sandwiches-revisited/
bubby
I just purchased the muffins, eggs and cheese and made 12 sandwiches for $5.50. Can you say bargain shopper. The muffins were BOGO, eggs 99 cents and Kraft real American cheese half price! I also had a nice chunk of lean ham that I sliced up and put on the sammies. Lovin me some breakfast!
glenda
How about making the McDonald’s apple pies. There awesome. Thanks
Carol
Thank you SO much for sharing this technique. My husband and I have been enjoying breakfast sandwiches ever since I found this.
Your cooking method for the eggs is PERFECT! I use my jumbo muffin pans and the eggs fit great on the English muffins.
My hat’s off to you!
Thanks again,
Carol
Lou Ann
If you wrap them in a papertowel before microwaving the papertowel will absorb most of the extra moisture instead of the bun.
Kimberly W
I bought all my ingredients at Costco. I made 24 sandwiches as that is as many English muffins came in the pack. it worked perfect because I have two cupcake pans so that made 24 eggs. I added Canadian bacon. The whole project couldn’t have been more than $20 which is less than a buck a sandwich so SCORE! (note: I didn’t use any organic products which is why my cost was so low)
Daisy Willsey
What a unique idea! Just have some hash browns on the
side with a hot steamy cup of coffee.
Bonnie
I never would have thought of cooking eggs in a muffin tin. What a great idea! This looks like it would be quicker to make then it would be to drive to the place and maybe wait on line (are there actually lines at McDonalds? yuck)
christy
I have got to try this. I have previously made breakfast sandwiches and put in the fridge for my family to heat up, but I have not tried cooking the eggs in the oven. Since I have been laid off from my job, I look for every way to cut my budget. & this should help! thanks
Kathy
I wonder how these would be w/ scrambled eggs baked in muffin tins? Hubby will only eat scrambled eggs. I think he would like these.
Mindy W
These are great! I am thrilled about baking them in muffin tins! Thanks a million!
carlyn
@Kathy, try breaking the yoke in the muffin tin using a knife with a fine point. Mixes well without scrambling and doesn’t have the bump!
tammy
Love these!! They are so easy to make and delicious!! Thank you!!
Jodi
I love these. They are so cute. The perfect size for putting on english muffins. They do freeze well so I can make several at a time to save for breakfast later. And much healthier than buying fast food or even packaged frozen breakfast.
LisaI
I’m unconvinced that these cost more. You can make and freeze a whole batch at once, so you’re not paying for the gas to drive to and from McDonalds.
Michele
Wow! Definitely going to try this! I was just thinking that wrapping them in foil before freezing would make them that much easier to reheat! You could just pop the wrapped sandwich onto the oven rack… Thank you for this wonderful idea!
Jane
I eat Hogsdon Mill Oat Bran every morning for breakfast. And I frequently make this sandwich for lunch & eat it with Sun Chips. It is quick, easy, cheap, & no-fail. Next time I will be making them 6 at a time bec that’s how many whole wheat muffins come in the pkg. I often throw some out bec they go bad before I can use them. Cooking eggs in a muffin tin is a terrific idea. Can’t wait to try it! Thanks for posting this.
Jordan
You could have made them for well under a dollar each if you had purchased less expensive products. The ones you choose are the most expensive products where i live. you could have bought western family or kirkland signature products which are still a good quality and the total could have come up under $12
Jennifer
I did this after seeing your post and it worked great! The only things I did differently were – I poked the egg yolks before baking so the yolk would be in more bites. I am lucky enough to have a toaster and microwave at work so I didn’t toast the english muffins. After the eggs were frozen I wrapped each one a paper towel and put it in a small freezer bag. I added the untoasted muffin, a slice cheese wrapped in waxed paper and a slice of deli ham also wrapped in waxed paper. This kept all the items apart so they couldn’t stick together in the freezer. When I am on my way out the door I grab a bag. I toast the muffin while I reheat the paper towel wrapped egg for 30 seconds. Then when the muffin and egg are hot I stack all the ingredients and wrap it in a paper towel to sit and disperse the heat for a minute or so while I fill my coffee mug. Works great and nothing gets overheated in the microwave.
Noel
Im moving next week and am going to whip up 2 dozen of these for my family to heat up themselves! Thanks so much for the recipe!
Caroline
These look great, and I agree with you on all accounts, EXCEPT your breakfast sandwiches don’t have 3 ingredients. Eggs is one, and I’m sure the English muffins themselves have a group of ingredients, and even the cheese usually has a few. It’s a technicality, but still.
michelle
not only is it more cost effective for just the sandwich but who goes to McD’s and gets JUST the breakfast sandwich, so in the end you’re saving a lot (which you include the meal)! thanks
Jennie Waitkevicz
Hi, McDonalds uses Canadian Bacon, which is pretty healthy.
Whitney Lindeman
Made our version of this this morning, and I would say it was a HUGE success! Used rolls instead of English muffins just because that’s what we had, used Swiss cheese, and added some turkey. REALLY tasty. Thanks for the idea!
Christy
I made these last night. I am a clean eater so I just made the eggs and then put them on Ezekiel Muffins and then added a little sharp cheddar and wilted spinach…..um boy are they good. I am going to add this to my any meal arsenal! THanks for the tip!
Cheryl
I believe if you watch the sales at some of the major grocery stores when they have the BOGO free on the english muffins then you can probally cut your cost. This would be the same for the sausage and ham. I have not seen Canadian Bacon on a BOGO but it could happen.
This is a great idea and I plan on trying it out the next time they have the English muffins on BOGO.
Margaux
Any tips for getting the eggs out of the muffin tray?
Nick
Well, if they are stuck, they are stuck. All you can do is run a knife around them and try to get them outta there. Be sure to spray the pans well or butter them before baking or if you pans are really old you might think about getting some new ones. They should slide right out if you have decent pans and oil the pans slightly. Good luck!
Jennifer
I mentioned this post in my latest post – I hope htat is okay. We made this with bagels – sooooo good. Thanks – Jenny
Tori
Can’t wait to try this! I was thinki I might also “scramble” the eggs adding some bell pepper and diced onion. Omelette on a bagel or english muffin. Thank you for sharing this!
Holly Pierce
Tori…I would use sautaed onions and pepper. I don’t know if they would be done with the oven baked egg…
Jazmine
Thanks Nick. Cannot believe I didn’t think of doing this before. Mine came out so delicious. To microwave mine, I used to same directions on packages of Jimmy Dean sandwiches
———————————————————————
DIRECTIONS WERE DEVELOPED USING AN 1100-WATT MICROWAVE OVEN. OVENS VARY; HEAT TIMES MAY NEED TO BE ADJUSTED.
FROM FROZEN
1. REMOVE FROM WRAPPER. WRAP IN PAPER TOWEL.
2. MICROWAVE ON DEFROST (30% POWER) FOR 1 MINUTE 3O SECONDS.
3. TURN SANDWICH OVER; MICROWAVE ON HIGH FOR 65 SECONDS OR UNTIL SANDWICH IS HOT. (FOR MICROWAVE OVENS LOWER THAN 850 WATTS ADD 35-45 SECONDS, IF NEEDED.)
4. LET STAND IN MICROWAVE 1 MINUTE BEFORE SERVING.
FROM REFRIGERATED
1. REMOVE FROM WRAPPER. WRAP IN PAPER TOWEL
.2. MICROWAVE ON HIGH FOR 65 SECONDS OR UNTIL SANDWICH IS HOT. (FOR MICROWAVE OVENS LOWER THAN 850 WATTS ADD 5-10 SECONDS, IF NEEDED.)
3. LET STAND IN MICROWAVE 1 MINUTE BEFORE SERVING.
.
Jammie
Mcds are almost three each here! Sausage ones are a dollar
JoAn GODFREY
i did not read all the comments, but Egg McMuffins are almost $3 each!!! they also have a slice of canadian bacon.
Lynne
Super recipe, but I’m single and it doesn’t really work for me and I don’t like frozen eggs. Awhile back I bough an ‘egg ring’ from Crate & Barrel. I use this to fry the egg while the English muffin is toasting. Works great. This recipe would be great for a church breakfast, tho. I’ll definitely keep it.
Holly Pierce
Can you simply freeze the cooked eggs? Then I could simply toast a muffin and assemble.
Doris Moore
how do i subscribe?
Nick
Hi Doris, You can subscribe and get daily posts in your email here:
http://feedburner.google.com/fb/a/mailverify?uri=Macheesmo
Thanks!
Acidfree
Yo! My family tried these the past night, and the muffins were very crusty…is there a way around that?
Thanks for your time…
Nick
Hmm… Maybe just bake them for less time? I like mine pretty crusty. :)
Julia
I made these tonight because i have been craving fried eggs well i love the mcdonalds version and i added ham and these are amazing, i am freezing them for work so excited for something so cheap and easy and they are not 1$ at mcdonalds its more like 3 or 4. thanks again!
Darleen
These look amazinging easy to make! Although I think if I make them for later use I will just freeze the eggs, so I can zap them in the microwave while toasting a fresh muffin!
Molly
Doesn’t it take less time to make a breakfast sandwich from scratch (and less energy) than to heat an oven and then bake something for 25 minutes? If you time everything right, you can make a breakfast sandwich in 5 minutes or less. I do it everyday at home.
simmie
not reallly. you heat an oven put the sandwich in and get dressed/do your hair while its cooking. to make a sandwich you grate the cheese, toast the muffins, cook the egg and you have to be there the whole time watching it. i cant put on mascara and make a breakfast sandwich so it saves me a bunch of time.
Christine
Read your info thank you. Here is an idea for you, if in a hurry put a cup of water in the microwave with a sandwich so it will not get soggy. I read this on Pinterest about a slice of pizza. I know I’m always in a hurry I’m glad I remembered. This might help others too. Thank you again for the idea
Meow Meow
Exactly what I was thinking. This is a good recipe if you’re making breakfast for a crowd, but this is not efficient for the purpose of freezing for future meals.
Jessica
I love that you’re making the food instead of getting it from MacDonalds, and I’m sure these are better for you, but I have to point something out. Don’t those 55 ingredients they list include all of the ingredients that go into the english muffin? And the cheese? And the butter, or liquid margarine? (Ew!) I mean, that stuff doesn’t just come off a tree, it all had to be made before you used it, right?:)
Nick
Haha. Yea. You are part right for sure. Even if you count all the ingredients in the ingredients I use, you get to about half… it’s around 30ish. So still not great, but not 55! PLus, I think mine taste better. :)
Rachel
These were good but it took a lot of scrubbing to get the egg residue off my muffin pan and I thought I greased them pretty good.
Samantha
I just spray mine really good with no stock cooking spray and the eggs slide right out when they are done. What type of pan is it dark metal?
Rachel
Just curious, could I just make the eggs and freeze them by themselves? Then when i want to eat one of these yummy sandwiches I could just thaw it the night before and heat it up when ready with a biscuit and slice of cheese?
THANKS!
p.s. I’m a new cook ;D
Nick
I don’t see why not Rachel! Good luck. :)
Jennifer
We are going to try mixing the yellow in with the white before baking the egg. And this DOES save time versus the fast food version, because we don’t have to load our child up in the car every morning to go drive to get one! :)
Andreina
These would also be great for Eggs Benedict!! Why didn’t I ever think of this.
Talia
Question. If I were to want to add turkey sausage to the sandwich, would I warm up the sausage and then freeze it again with the rest of the sandwich or should I just place the pre-frozen sausage on the sandwich and then place in freezer? :)
Nick
I think it depends Talia. If the sausage is pre-cooked I don’t see why you couldn’t just toss it on the sandwich since it is all going to freeze together anyway. If it is uncooked, then you’ll want to cook it first and add it to the sandwich. Good luck!
Talia
Thank you!
Dolores
haven’t tried this yet but sounds like a great idea and i also like to make things from scratch and get the good benefits. thanks for the idea am going to try them
Melissa
I love this idea but the egg looks too thick for me, I’d scramble them and fill 12 muffin cups with the mix from 6 eggs to make it thinner. Super thin sliced cheeses would work too, I use a wire cheese slicer so I can get my cheese pretty thin. I like sausage on mine too I but onion & green pepper bulk sausage from a local butcher and it is fantastic just brown it and then add to the muffin cup with the egg so it all stays together. The English muffins aren’t the best for you but using good bread would be healthier and I know rolls would fit this stuff perfectly.
Mcmike
In a rush?
Pop the frozen suckers in the microwave along with a glass of water. Will keep the brea crisp and take no time!
Works with pizza too.
You’re welcome!
Danielle
I make these all the time and grab one from the freezer to microwave at work. For me, that’s definitely time saved because i don’t have to cook anything in the morning and don’t have to wait in line for fast food. I flip it over several times while it microwaves and that also helps solve the soggy english muffin issue.
I make my eggs in whoopie pie pans so they’re closer to the size of the english muffin. Then I put pre-cooked sausage patty, bacon, turkey bacon, soy sausage, etc on it with a thin slice of cheese. I also break the yolks and crack some pepper onto each egg.
Sarah P.
Tried these this morning and they were delicious! I just toasted my muffins in the toaster. My one and four year old loved them as well. Thanks for the recipe! We will be making these again for sure!! :)
hi
ya its a great idea im using it right now for my moms birthday and it is 5:00 am!!
Elizabeth
As a former McDonalds employee (as of about a month ago), your version actually comes out cheaper. They sell a single sandwich for around $3.49. The only difference is that their version includes a slice of canadian bacon, something that you omitted. I like the idea of making these ahead of time and reheating them while you get ready in the morning!
Anastasia
These are great! I made them this week. I did stick a fork in the yellow part of the egg before putting them into the oven. It helps spread the yolk out and you have more of that yummy “egg” taste on every bite!
Heidi Marie
I made five eggs in the oven (all I had were 5 leftover biscuits to make these lol) but at 10 minutes they were runny but after 14 they were rubbery. Do you have to make a whole tin full to have them cook up properly?
Nick
Hey Heidi, yea… just cooking a partial pan will very much affect cooking. When you do this you should fill the empty tins with water which will even out the heat. ;)
Good luck!
Heidi Marie
Well dang lol I will remember for next time! I still used them and hope they will taste ok!
Nick
I’m sure they will be fine. :)
Jennifer
Hi,
I am baking the eggs right now but I don’t eat gluten so the bread will be omitted. How would I freeze just the eggs?
Thank you,
Jennifer
Nick
Hey Jennifer,
I would just slide them out of the baking tins when they are cool, freeze them on a baking sheet so they don’t stick together and then wrap and store them in a freezer bag.
Good luck!
Jennifer
Thank you :)
Food Making Machine
Nutrious and amazing!!! Love It!!! Thanks for your sharing…
Patsy
I haven’t made a large batch to freeze, however, I have made similar versions individually…
Microwave safe bowl… spray with non-stick cooking spray.. crack an egg in the bowl, swirl a little if you want the “McMuffin” look or scramble, place a frozen sausage pattie, turkey bacon, or ham right on top, cover with paper-towel.. cook 1 min on high – place cheese on top, slide out of bowl on muffin, bagel, toast or alone.. enjoy! Thanks for the info…I will try ;)
Nicci Du Preez
Try warming stuff on top of the usual two slice toaster… Works great with halved croissants. We avoid the microwave.
kelly
I just made these today for the second time. They are delicious. This time I used muffin top pans so the egg wasn’t so thick and fit the muffin better. I also add a pre cooked sausage pattie. Just put it on the muffin frozen. My husband and I work different shifts so I don’t want to heat the oven up twice in the morning so I just take the muffins out of the freezer the night before and put them in the fridge. In the morning I open up the sandwich (egg on one side, sausage on the other) and put it on a paper towel covered microwave safe plate for 30-40 seconds. We love these. Thanks so much for the idea.
Linda
It’s a lot cheaper when you have a couple chickens and can get fresh eggs like I do. I’m sure going to try this. Thank you.
Meribah Christensen
These were great! However, mine take a lot longer than 25 minutes to reheat in the oven…
Jen
Farm fresh FREE eggs, buy one get one English muffins and good name brand cheese would definitely be cheaper… but as previously stated, you can’t beat the home made no preservatives even for the extra money!
Pamela
If you only need one or two breakfast sandwiches using one or two eggs, a much easier way to make each sandwich is to spray a microwavable coffee mug with cooking spray, crack your egg into the mug and microwave it for “40 seconds”. It works great. Then layer your toasted, multigrain English muffin with the ingredients that you like. I use Canadian bacon or lean ham, one slice of cheese and then I slide the egg out of the mug on top of the cheese and top with the top half of muffin. If need be, microwave the whole breakfast sandwich for another 5 to 10 seconds to make it really hot.
Several mugs with an egg in each can be used for more sandwiches and you can have an assembly line in their preparation.
tishA
Has anyone tried this with biscuits instead of english muffins?
Andrea
As we “speak”…
binary options system
Thanks on your marvelous posting! I truly enjoyed reading it, you will be
a great author.I will make sure to bookmark your blog and will come back very soon.
I want to encourage you to continue your great writing, have a nice weekend!
Linda
Love the muffin tin idea. For a healthier version of this, I would use flatbread and a slice of mozzarella cheese. It is actually similar to sandwich you buy on flatbread in the frozen section of your food store. I wonder if you could freeze the egg and then reheat it in the microwave oven and put it and the cheese on the flatbread. I plan to try it.
BetsyD
I’m so excited to try this! What a fantastic idea to use a muffin tin! Perhaps someone has suggested this already, but have you considered making your own muffins and making them whole wheat. Am trying this recipe soon– http://www.utahdealdiva.com Should help cut the cost significantly, I would think.
Meredith
These were delicious! I scrambled the eggs with a bit of shredded cheese and bacon bits and put them on grands southern style biscuits. I may try cooking the biscuits next time with some maple syrup in them, to get the taste of a mcgriddle :) the eggs did stick, even though I coated the pan in butter, but the sticking wasn’t bad, just a small bit of the egg actually stuck, and I think it was due to the shredded cheese melting into the pan. Still, they are delicious! Great for a quick breakfast or maybe even something to make for Christmas morning!
Cathy Dunham
What if you preferred Biscuits over Muffins? Especially the Mickey D Chicken Biscuit – which BTW they do not offer any more… Aaaaargh, thus I rarely swing by fast food for breakfast any more.
And biscuits could heat up nicely in a pizza oven – as well as your McMuffin version.
bodaciouscougars.com
Thanks for your personal marvelous posting! I quite enjoyed reading it, you
are a great author.I will remember to bookmark your blog and definitely will come back down the road.
I want to encourage that you continue your great work, have a nice day!
ashley
It just donned on me, if you didn’t want/have time to preheat the oven in the morning, a toaster oven could help cut down on the time!! I usually fix my breakfast in my office (cold/hot cereal, a lot of these from McD…) so if we had a toaster oven at work I bet all of us would go for these!!!
I wonder if it would work with biscuits… (boss man won’t eat wheat muffins)
Elinor
Tried these last Sunday and they were a big hit. Thankyou.x
Melody Elzy
Actually McDonald’s charges $2.79 for one egg mcmuffin. Also, you can leave their food sitting for a month or longer with no mold growing on it. That should tell you something about all the preservatives in their stuff. So you can make it healthier for less money. Good for you AND good for your wallet!!!
sambo253
i use whole wheat english muffins too. but i cook egg beaters or egg beater egg whites on a flat skillet and use a biscuit cutter to cut all the rounds i need for eggs, and i do the same with smoked ham rounds. as for the cheese, its just a simple square of cheap processed stuff melted over the sides. still very healthy though, and i usually reheat in a microwave. thanks
Heidi
Do the eggs have a texture like poached eggs?
Cil Martel
this is great, another hint that might help others::: I use a Correll cereal bowl, spray it with non stick spray, add egg, cheese, ham, sausage crumbles or bacon bits, etc add salt & pepper to taste. microwave cook per egg-1 minute, while your bread (of choice) is toasting. the egg mixture will slide right out of the Correll dish onto your bread , If you do not whip egg with fork, poke the yellow with a fork before cooking and i cover mine with a microwave cover. ENJOY :-)
Leahhansom
You could fry an egg, pop a muffin in the toaster and grate some cheese for a fresh one in less time than it takes to reheat a frozen one in the oven. This seems like a waste of time.
Nick
Heya, I think the reason some people prefer this method is that you don’t have to dirty any dishes and you can also reheat the frozen muffin while doing other stuff. Pop it in the oven, do some morning chores and then breakfast is ready with minimal work.
Rhonda
I saw on another site that if you put a glass of water in the microwave while rehearing a slice of Pizza, the crust will not get soggy.
Vicky
If you are worried about nutrition, DON’T microwave! Put it in the toaster oven while you do other things to get ready in the morning. Microwaves destroy any nutrition in your food.
Jackie
Thank you for including the oven directions. I don’t have or want a microwave so I was very glad to see the alternative. Just a note, toaster oven! Also this is going to be great since I have Chickens and I’m getting a nice supply of eggs.
Sal
What if there’s no microwave or oven available? Can you just thaw them out the night before? what do you think it would be like? I have diver sons who dash out at 5:30 in the morning and need to eat something a little later in between dives. Please reply. Thanks
Nick
Hey Sal, I honestly think these need to be reheated. Cold egg cheese and muffin isn’t going to be the best. I would think something like this veg bagel sandwich would work better which he could make the night before, wrap up and keep in the fridge, and it would be great the next day.
https://www.crunchtimekitchen.com/2013/01/big-veg-bagel-sandwich/
Nikki Poppe
I know for Pizza you can put in a small glass of water (I maybe put half a cup or so in a short glass) in the microwave when you reheat it and it keeps the crust from being this chewy mess. This may also help with your sandwich reheat. It takes a little bit longer to reheat. Maybe 1 minute instead of 30 seconds for pizza but it’s worth it for less chewy crust.
Nick
Nice Nikki. Never tried that but I definitely will! Thanks for the idea.
nancy
We love these! My girls don’t like them super crunchy or crispy so I have learned to wrap the hot sandwich in a dampened paper towel and then in a piece of foil and let them steam a bit. They eat them on the go. I also cook sausage patties formed in a hamburger Pattie press–they are the perfect size for English muffins when cooked!
Selena Goodhead
I wait until McD’s Breakfasst stuff Goes On Sale
This Week its EggMcMuffins ! 1 at reg price $2.00 and the 2nd at whatever the Temp was the day before ( 5 degrees = 5 cents for teh 2nd one. = $1.05 cents each with tax !
I Load up on them and will get 10 at a time ( 5 & 5) is their limit per order..
And Just bought 10 for our Local Fire Dept guys ! and dropped them off for them !
Get a Sepearete Freezer and Put in the Garage?
( even a smaller one for your Kitchen Pantry/Closet) and you Add 1″ Foam Panels to the Oustide of it for better Insulation! Will run -50% Less! = cost -50% less to Run !
Do the same with your Refrig! Cover all 3 sides with 1″ Foam Panels !
We bougth the Firehouse a Freezer thru the Local Home Depot a few yrs ago( they sold it ot use for -50% off) and now they can store alot more Stuff in that Big Freezer..
Get a Smaller one for only about $150 and keep it in your Garage..Wait for sales and Fill it up !
We also set up Racks in the garage for When Sales go on for Paper Products ! Get the Better Quality Products for -50% off with 2 for 1 coupons, etc.. Paying the same for the Cheaper stuff, but getting the Better Quality stuff.. !
Same now for the Big Mac! Get the 2nd one for only 19 cents !
1st one is $3.25 , 2nd is 0.19 cents , = $3.44 by 2 = $1.72 each.
Buy 5 and get 5 .. = 10 for $17.20
And use the Box for the Big mack in a Plastic Bag. and in the freezer they go!
Best Housewarming Presents?
Buy them a Seperate Freeze for their Garage!
Buy them some Free Standing 4 shelve Plastic Shelving for their Garage!( For Paper products)
Buy them a Garage Floor Vynil Liner/Cover! Clean The Concrete and cover it with this Vynil Liner !
Auto Recoil Extension Cord – 25 ft.
Hope this helps someone else !
barbara
Outstanding, Selena!! Thank you1!!
Loy Forbes
Where doy ou shop at McDonald they are Over $3.00 here.
Jim L
Someone needs to edit the McD prices to reflect 2016.
They’re MUCH more expensive now all around, breakfast and burgers…. almost twice what they were in 2008!
A Big Mac is now 4 bucks. ONE egg McMuffin is about $3.50!
I only buy these when I have the 2 for 1 coupons, I can make them at home fro less than half and they’re bigger and better!
Andrea
Up here in B.C. An egg mc muffin is over $3.00!
Kelley Butler
It is a much better deal to make them at home not to mention the nutrition aspect. They are over $3 in Texas. Occasionally they will go on sale 2 for $5.
ellena eclipse
Thanks for sharing..
Foods being prepared at home are always the safest when it comes to our health.. It just need sometime to prepare them..
Todd M
I love the use of the muffin pans and yes Egg Mcmuffins are closer to 3 dollars a piece but they also have canadian bacon on them. I would say it is safe to say that even adding the meat to the homemade version will be cheaper and healthier. Not to mention you can choose if you want meat and which you want to use! Thanks for sharing!
Amanda Durham
Just made these. A big hit! Super easy! Thanks!
Amy
These were super easy to prepare, which left me optimistic. I froze them and just took our first ones out of the oven. After 30 minutes on 350, they are ice cold and frozen in the middle! Suggestions, anyone??
Nick
Sorry to hear that Amy! That can happen depending on the thickness of your sandwiches and your oven temp, but there is another way. If you take it out of the foil and microwave them for 60-90 seconds and then transfer them to the oven just to crisp up they will be great.
That said, 30 minutes should really be enough in normal circumstances. You might want to get an oven thermometer to check and make sure your oven is the right temp. Good luck!
Belle
Do you recommend thawing them before heating them in the oven? That may help with the frozen center.
Nick
Hey Belle, I really don’t just because it makes it harder to prep, but you could for sure. If you just move them straight from the freezer to the hot oven, it really shouldn’t take longer than 30 minutes or so to thaw and heat. So that’s what I always do and it’s super easy. Good luck!
Jim L
I freeze a lot of McDonalds. I defrost them in a microwave on VERY low (#2) for about 3 minutes … then they go into the toaster oven.
Deanna M. Osborne
I like to wrap them in damp paper towels and warm in microwave on the defrost setting. Still taste great. Its the best way for any reheat to keep meal integrity. Try it
Carolyn
How is the english muffin when you do this?
I havent tried to make them yet but I need something quick in the morning. I dont have time to do what the author said in the oven from frozen so microwave is my only option…
Jim L
You still have to heat or toast them afterwards
Justin
How long did you put them in the microwave on defrost?
Nick
Hey Justin, I microwave them on high actually for 75-90 seconds. That usually does the trick depending on your microwave power.
gary
whyfree themmae make them cook to order it take longer to reheat them them t maketem fesh
Alicia
Hi! Try microwave the sandwich to “warm it up” the use oven or toaster oven. Also, my kids will take it apart microwave the inside and toast the bread. It seems like a hassle but you get used to the process and they love the result. I love that they eat before school!
Bayou Andy
Hey Nic. Great idea. I had some smoked Andouille sausage left over and I cut
it into small cubes and add to the eggs in the muffin pan. Then tried it again
with some plain old sausage I smoke on the grill and it was a winner again.
Thanks for the recipe.
Stan W.
Great directions. I was always trying to figure out how to make the eggs thick. And BAM!!! It was sooo easy. Your idea of using a muffin tin was excellent. These have to be better than McDonalds. I usually buy one of theirs every morning. But now thanks to you I can make these up ahead of time, and save some money to..You ROCK!!! Thanks for the article..
Heather
Just wondering if u wrap them in foil to heat up in the oven or if u just place them uncovered into the oven?
Nick
I usually leave them wrapped in foil when I heat them in the oven, but I think either would work fine!
amber
Great recipe! To save even more money, skip the organic eggs. Regular eggs have the same nutritional value as organic. Cant wait to try this.
April
To have the eggs taste better than regular eggs or organic eggs, try buying FRESH eggs from a farmer, Farmers Market etc. You will notice that the eggs are a very bright yellow and they taste waaay better. I have been raised having fresh eggs! Buying eggs out of the store, I can tell a big difference and they taste old. Which in fact, they are. Try them, you will be hooked!
Sara
If you are just preparing these for the week would you still put in the freezer or in fridge? If fridge how would you go about heating each morning? This is a great idea!
Nick
Hey Sara, you can definitely stick them in the fridge if you are eating them within the week. I would unwrap and heat in an oven or toaster oven just so the bread stays crispy. You could do the microwave in a pinch but it’ll get a bit soggy. Pop it in and it’ll need 15 minutes or so while you do other stuff in your morning routine!
Jim L
NEVER put bread into a fridge, you freeze it
Becky Blackwell
I have chickens so I get fresh eggs and love this idea wow save time and money on breakfast for husband and kids.
Angela
I am actually somewhat an extreme couponer. Making these now and with my savings, mine will only be about $0.25 each! I use the toaster over too so it is a little faster. Love the idea!!!
Terry Elmore
I have to admit this is a great idea. I have purchased the Jimmy Dean’s Breakfast Croissant sandwiches for about 3 years now. Wish I would have thought of this sooner. When people are posting that the frozen ones are still cold in the the middle, I would suggest taking them out of the freezer the night before and putting them in the fridge. Then it would not take that long in the oven OR toaster oven.
Are you sure that you do not crack the egg yolk so it does not squirt out when you bite into it? That is how I make them when I do one at a time.
Thanks so much for the idea!
Gina
squirting egg yolk is so yummy. It’s my favorite part. I’m probably the weird minority.
Glenda M
I toast the buns in my toaster while I cook an egg and top with slice of real cheese (cooked with spray olive oil or butter). I put the warm MyMuffin in wax paper and off to work. I DONT USE FOIL OR ANY ALUMINUM product.
Maureen Green
Very clever Nick! Only a clever Nick could come up with this…I have a Nick and he’s a clever bugger too. I have sent this recipe off to my sister and her family. They love ‘Egg McMuffins’, I’m hoping this is right up her ‘alley’ so to speak. Keep all those recipes coming, very good and nice to have a time saving option as well.
Carrie
Thanks for sharing! I make eggs in a “muffin top pan” which is wider and shallower. The egg goes all the way to the edge of the muffin/bagel or a little beyond. I usually make the eggs and put them in the fridge for the week, and then reheat the egg in the microwave, toast the muffin, add the cheese and assemble. I’m definitely going to try pre-assembling them now thanks to your tips! :)
Kay-M
I also use a muffin top pan!
Cyndi
I love this! Any tips on how to make the McDonalds hash brown? I would be in heaven if you do.
Laura
We buy Mr Dee’s hashbrown patties to bake in the oven.
Patty
I love the idea of cooking the eggs in the muffin tins. I am going to do this but use home made biscuits instead of the muffins to save even more!
lori
Can’t wait to try these with my eggs from our chickens!!!
Colleen Natalie Hunt
I love egg mcmuffins, especially mcgriddles! Ive been making my own for years now, a slice of pepperoni or salami is amazing on it too… My trick is to put pancake syrup on the buns with the butter, then the eggs and cheese… Its simply amazing! Taste better the McDonald’s any day!!
Claude
I few comments , 1st part of the issue of an egg mcmuffin is Canadian Bacon, however… This worked great the price at mcd’s was over 2.50 which should still be enough savings to put the bacon on it but I liked them without. I also believe they use american cheese and I preferred it with a sharper cheddar.
Kay-M
I have made my own McMuffin sandwiches for years, so, like you, I know they are much better than buying them!! But let’s be totally honest – the 55 ingredients that McD’s lists, also include everything in the muffin and the cheese. If you were to include the muffin and cheese ingredients in your list of ingredients (because you are also using both of those, store-bought), you would have a lot more than the 4 ingredients that you list!! I’m certainly not taking the side of McDonald’s – I just expect honesty!
Phil
My thoughts exactly! I’m glad you made this post, otherwise I would have. The author makes it sound as if McDonald’s pulls out 55 ingredients in which to over complicate such a quick and easy breakfast sandwich recipe. There are only a few minor differences between what you pay for at McDonald’s vs what you may be cooking in your kitchen at home. (assuming you ordered a breakfast sandwich at McDonald’s with a round egg and not a folded scrambled egg) Differences being the brand of English muffin, type of cheese, and how the egg gets cooked. McDonald’s eggs are fried on the bottom and steamed/poached on the top,other than those differences, what you make at home has the same amount of ingredients in it. Personally, if I had the contraption that McDonald’s uses to cook there eggs, I’d probably never eat at McDonald’s again. I can buy a ring to cook a round egg in my frying pan, but they also have this lid (or they used to) that gets placed over the eggs while there cooking, and about a 1/2 ounce of water is placed on top and slowly drips down inside where the eggs are. This serves two purposes, first it’s what cooks the top of the egg, (they never flip there round eggs) and second, it also acts as a timer. Once that small amount of water has all dripped inside the eggs are all done cooking and nearly perfect every time. If anyone has ever seen a device like this that is available to the public please let me know where I can buy it from. I won’t ever get their folded eggs though as those are poured from a carton of liquid eggs.
Mikayla Vance
Could i have them be scrambled eggs, and still be in the pan? (beat eggs in milk and pepper is what i usually do)
Heather Elmore
Is it possible to make the same recipe with bagels or homemade biscuits instead of english muffins? I can’t stand english muffins. :(
Nick
Hey Heather, bagels would certainly work. I’ve never had much luck freezing/reheating biscuits though. Good luck!
Becky
I use fresh eggs from my ladies and fresh sausage proceased nearby with biscuits from scratch. I follow all the steps and my family loves having a good for you breakfast at their fingertips.
Mary
there is also the cost of gas going to mc donalds every morning!!!
Phil
Not if you ride your bike or walk, or if your already driving right past one on your way to work.
Lauren
could I do this process with just the egg whites, no yolks?
Nick
Hey Lauren, definitely should work. I would maybe use 1.5-2 egg whites per sandwich though. Good luck!
Linda
I have a batch of these in the oven now. Will start my new job first of next week and this will be a life saver for my husband! :)
CJ Parnell
I think this would work great on bagel thins!!! I would add onions, garlic, mushrooms and cheesey goodness on mine!! I could freeze just the eggs, take it with me in the car and it would be thawed by the time I got to work, toast the bagel, slap it together and breakfast heaven!!!
Nick
Love the Bagel thins idea! Thanks for the comment CJ!
Sierra Nicole
How many calories (estimated) are there per sandwhich?
Nick
Hey Sierra, I generally don’t calculate calories in my recipes but you can easily plug the ingredients into an online calculator for a good estimate. If you google calorie calculators or nutritional calculators there are a bunch of options. Good luck!
Julie Henriksen
After seing the video of how the MD burgers can stay OK for several years, I have been a little reluctant to eat there. Certainly there are benefits of eating more natural foods.
Linda Miz
Great ideas here. Thinking I will make the eggs and freeze and when ready to eat just toast my bread. Might also add Canadian bacon when reheating so egg is not greasy. After buying Jimmy Dean sandwiches and not liking the bread, it will be nice to use my favorite bread. Here’s to great breakfast eating my favorite meal.
kim
McMuffins do have that ;)
Breeona
Hey! I read your sandwiches revisited and decided scrambling was best for me. I added all of the seasonings I regularly add to my scrambled eggs; whole oregano, pepper, Tony Chacheres salt-free substitute, minced onions, and minced garlic. The problem I had is all of the seasonings rose to the top of the egg muffin! Oh no! We haven’t tried them yet, but I’m thinking the concentration of seasoning is going to be… interesting. I made twelve, so hopefully the cheese and other condiments we add will help balance out the taste. Lesson learned… Thanks for the recipe! I’ll be experimenting with seasonings to see what works best with this recipe.
Nick
Hey Breeona! I’ve had that happen. It’s really no big deal as long as you eat your sandwiches like a sandwich. You still get an even bite of spices and egg. It shouldn’t be too strong. GOod luck!
Mary
My quickie way to make these takes about 5 minutes. I make them fresh whenever I need one. I toast an English muffin while I make the egg in the microwave. I use a 4 inch ramekin, I crack an egg into it, break the yolk with a few pokes of a fork. Then I cover it with wax paper. I cook it on defrost for 3 1/2 – 4 minutes. Then when its done I assemble it with a little grated cheese.
Fresh, and fast.
Bev
I have been making my own for years… But only for one week at a time. I cook bacon and/or sausage set it aside to drain and cool, while I have a ring that I am frying my eggs in…when they are all done I put butter on the English muffins after cutting apart and lightly toast on same pan… I package same with same and refrigerate… When morning comes, I quickly assemble, wrap in paper towel, microwave for one minute or slightly less. But in ziplock and eat on my way to work!
Patti
I am a fast food breakfast junkie and I love this idea! Not only am I saving money, gas, and time in the drive thru but think of the calories saved also! Who just buys the sandwich? I don’t miss the hash browns when I make an egg sandwich at home so why do I need it there? It is convenient. So now I am cutting those calories plus the up sized coffee, soda, juice. Now my breakfast costs about 2 bucks including beverage at home instead of 5 or 6 bucks in the drive thru! Thank you Nick!
Doria
I make these “mediterranean” style – instead of butter, I cook the eggs with a bit of olive oil spray, I spray a bit of olive oil on Sandwich Thins and toast in the oven. Then instead of cheddar cheese, I add light Feta Cheese. And after re-heating, I add tomato and (uncooked) spinach. OMGoodness, so much deliciousness. I only make 6 at a time – usually Sunday morning, so I don’t freeze them. I have one that morning, then breakfast for the whole week. Yummy!
Doria
oops, I forgot to add I also usually add turkey bacon, but canadian bacon is also very lean and a good, quick choice. Maybe I’ll try that this week!
Doria
I forgot to add that I usually cook up 6 pieces of turkey bacon, but I like the suggestion above of canadian bacon. It’s also very lean, and would be a whole lot easier. I’ll try that next time!
Sillygirrl
This sounds amazing. We are getting ready for a big camping trip and I want to make these over a campfire. So what’s the trick to getting the eggs out of the muffin tin? Should they slide right out?
Nick
Heya! Yea.. i’ve never had a problem if I oil/butter the tin. It always works like a charm. I’m not sure why they stick on some people… could be the tin they are using. Good luck!
Kristina
Curious as we are hitting the camping season and we are always making these as a quick breakfast. Has anyone tried this method with the muffin Tins to make the eggs on a camp chef stove with grill box!?
Angie
I was thinking of making these for camping. Do you think they would reheat nice in the campfire? If i kept them wrapped in foil
Nick
Hey Angie! Totally. They would be a perfect camping breakfast. :)
franceska
I just made a dozen of the eggs for future sandwiches. I didn’t want to use entire bag of muffins when I need to be able to personalize for everyone (we all like different cheeses and meats too). Once they are cooled, I will wrap and put in freezer baggies. I cooked for 17 minutes as after 15, the top whites were still clear (may have been my muffin pan is reg size though). English muffin toasted, buttered (Amish roll butter) sliced cheese and with ham. YUM.
We have GF & DF kids in the house so I can make this with GF muffins and DF cheese…
Eric
One thing I would like to add that I did different was I used a whoopie pie pan. It fit the English muffin better and wasn’t as thick.
Stephanie
Hi! I just made a big batch of these and they were super easy and delicious! I decided to freeze half of them and just defrosted my first one (in the microwave for about 40 seconds) and noticed that the yolk was green? Does anyone know why that might be and if it’s ok? Is it from freezing? I did break the yolk but didn’t scramble them. Thanks!
Nick
Hey Stephanie, in my experience this green color actually happens from overcooking the egg a bit.
http://chemistry.about.com/od/foodcookingchemistry/f/Why-Do-Egg-Yolks-Turn-Green.htm
It’s totally fine to eat even if it doesn’t look appetizing. That said, obviously if it smells rotten or has an off odor, I’d toss it. Good luck!
Trish V.
This tip for cooking the eggs was genius!
FWIW, I made them with sausage patties and used hamburger rolls. I placed the sausage, egg & cheese in cling wrap, placed it inside the bun, then wrapped all together. This way I could microwave the inner ingredients for about 45 sec, wrap the bun in a napkin and microwave for about 15 sec., then put them together to eat. Just a tip for office folks who don’t have time to heat up the oven for breakfast. NOTE: Since I just made them yesterday, this one wasn’t frozen, but the frozen ones will take longer.
Donna
I use a muffin top pan to crack my eggs into, makes the egg about the size of the bun and not so tall.
Bep
I made this twice… It taste really good BUT the top of my baked eggs were hard like plastic… I had to peel the top of in order to make it edible… Anyone know why this happen? Ive buttered my pan and crack the eggs in… Am i missing something? Or did i over cook it?
Nick
Heya, sounds like maybe you overcooked them a bit. That happens to me sometimes. I would reduce your baking time by about 5 minutes and see if that helps. You might also grab a cheap oven thermometer and test your oven temp. I would bet it’s running 50 degrees or so warm. ;)
cora sisco
Could u put a.thin slice of sa,ham m this still work out?,
Nick
Sure Cora. I don’t think that would be a problem. Good luck!
April
I wanted to tell you that I love, love your website. I own a new website and I need fresh amazing material like yours. I would like to know if you would grant me the permission to use your RSS Feed for one of my tabs on my website. I will give you all of the credit of course. I can also add a link that will direct them to your personal website.
Antonetta
What about freezing just the cooked eggs?? Then microwave them while muffins are in toaster. Add slice of cheese. Should melt easily with everything hot.
Cheese with Noodles
Why have I never seen your blog before? I’ve already saved several of your recipes to make. Next week I’m going to try the spaghetti squash Asian stir fry and the monte cristo sandwiches. Yum!
Anyway, I’ve made these breakfast sandwiches twice now, both times with bacon. We love them. They’re great to keep in the freezer so I have something quick to toss into my husband’s lunches. Also, I buy the giant 5 dozen pack of eggs at Sam’s Club and these sandwiches are a great way to use up a lot of eggs if they’re getting close to their expiration date. Next time I’d like try try ham, but I almost always have bacon on hand already.
Thanks for the great idea, I’m sure I will make these sandwiches many more times!
Cheese with Noodles
Let me add that the reason I’ve made these sandwiches twice already even though I just found your blog today is that the recipe was posted on Buzzfeed a couple of months ago. They had their own version, but it was identical to yours. When I tried googling the recipe, I ended up at your blog.
Raysa Vickers
Can I add sausage or Canadian bacon on this and still freeze it?
Nick
Hi Raysa! You absolutely can. If you use sausage, just make sure you cook it through and cool it completely before freezing it in the sandwich. good luck!
F Sethman
I have been doing this for quite awhile now and have totally perfected it;) I could never work at McD as I’m to much of a perfectionist and would take way to long. Lol
Anyways, it’s so much better to do things YOUR way and not everyone else’s generic way. As the comments say: use different English muffins, variety of cheeses, meats, plus it’s a great way to use those farm fresh eggs when the chickens are laying as much, we can still enjoy the best eggs ever-ours!! I got the breakfast sandwich maker but I still use this method for making ahead breakfast sandwiches. I never put the cheese right away-frozen cheese is nasty and cheese melts off.
Alicia Clark
How long would I put the eggs in the oven for if I wanted the yolk runny?
Nick
Hey Alicia, I don’t think you can get runny yolks with this recipe. It’s closer to an egg mcmuffin style breakfast sandwich. If you want a runny yolk you’re better off just making the sandwich individually and frying/poaching the egg. Good luck!
Robert Balog
Would it take less time if I used scrambled eggs?
Avan
How many days the sandwiches could stay in the refrigerator?
I think it would be a good day if I can eat breakfast at home. Thanks for your sharing.
Nick
I think they would be okay in the fridge for 2-3 days. After that I think they’d get soggy and weird. Good luck!
Jaydip
I will surely make one of them this weekend.
Brandi Highfill
How long do you think these would last in the refrigerator?
Nick
I’d say they would be okay for a work week. 4-5 days! Good luck!
Daniel McKenzie
I want to add sausage to this recipe. If I freeze the sandwiches with the sausage in them will they reheat well?
Nick
Yep! Should work just fine. Good luck!
Daniel McKenzie
I want to add sausage to this recipe to make egg and sausage sandwiches. If I freeze the sandwiches with the sausage in them will they reheat well?
SHANDONG LOYAL INDUSTRIAL CO.,LTD.
I just made these today for the second time. They are delicious. This time I used muffin top pans so the egg wasn’t so thick and fit the muffin better. I also add a pre cooked sausage pattie. Just put it on the muffin frozen. My husband and I work different shifts so I don’t want to heat the oven up twice in the morning so I just take the muffins out of the freezer the night before and put them in the fridge. In the morning I open up the sandwich (egg on one side, sausage on the other) and put it on a paper towel covered microwave safe plate for 30-40 seconds. We love these. Thanks so much for the idea.
Sachin
when its come to non veg!! its like wowww for me…
thanks for sharing these kind of stuffs