

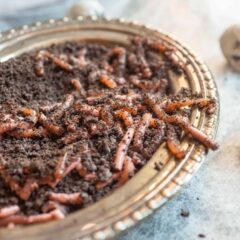
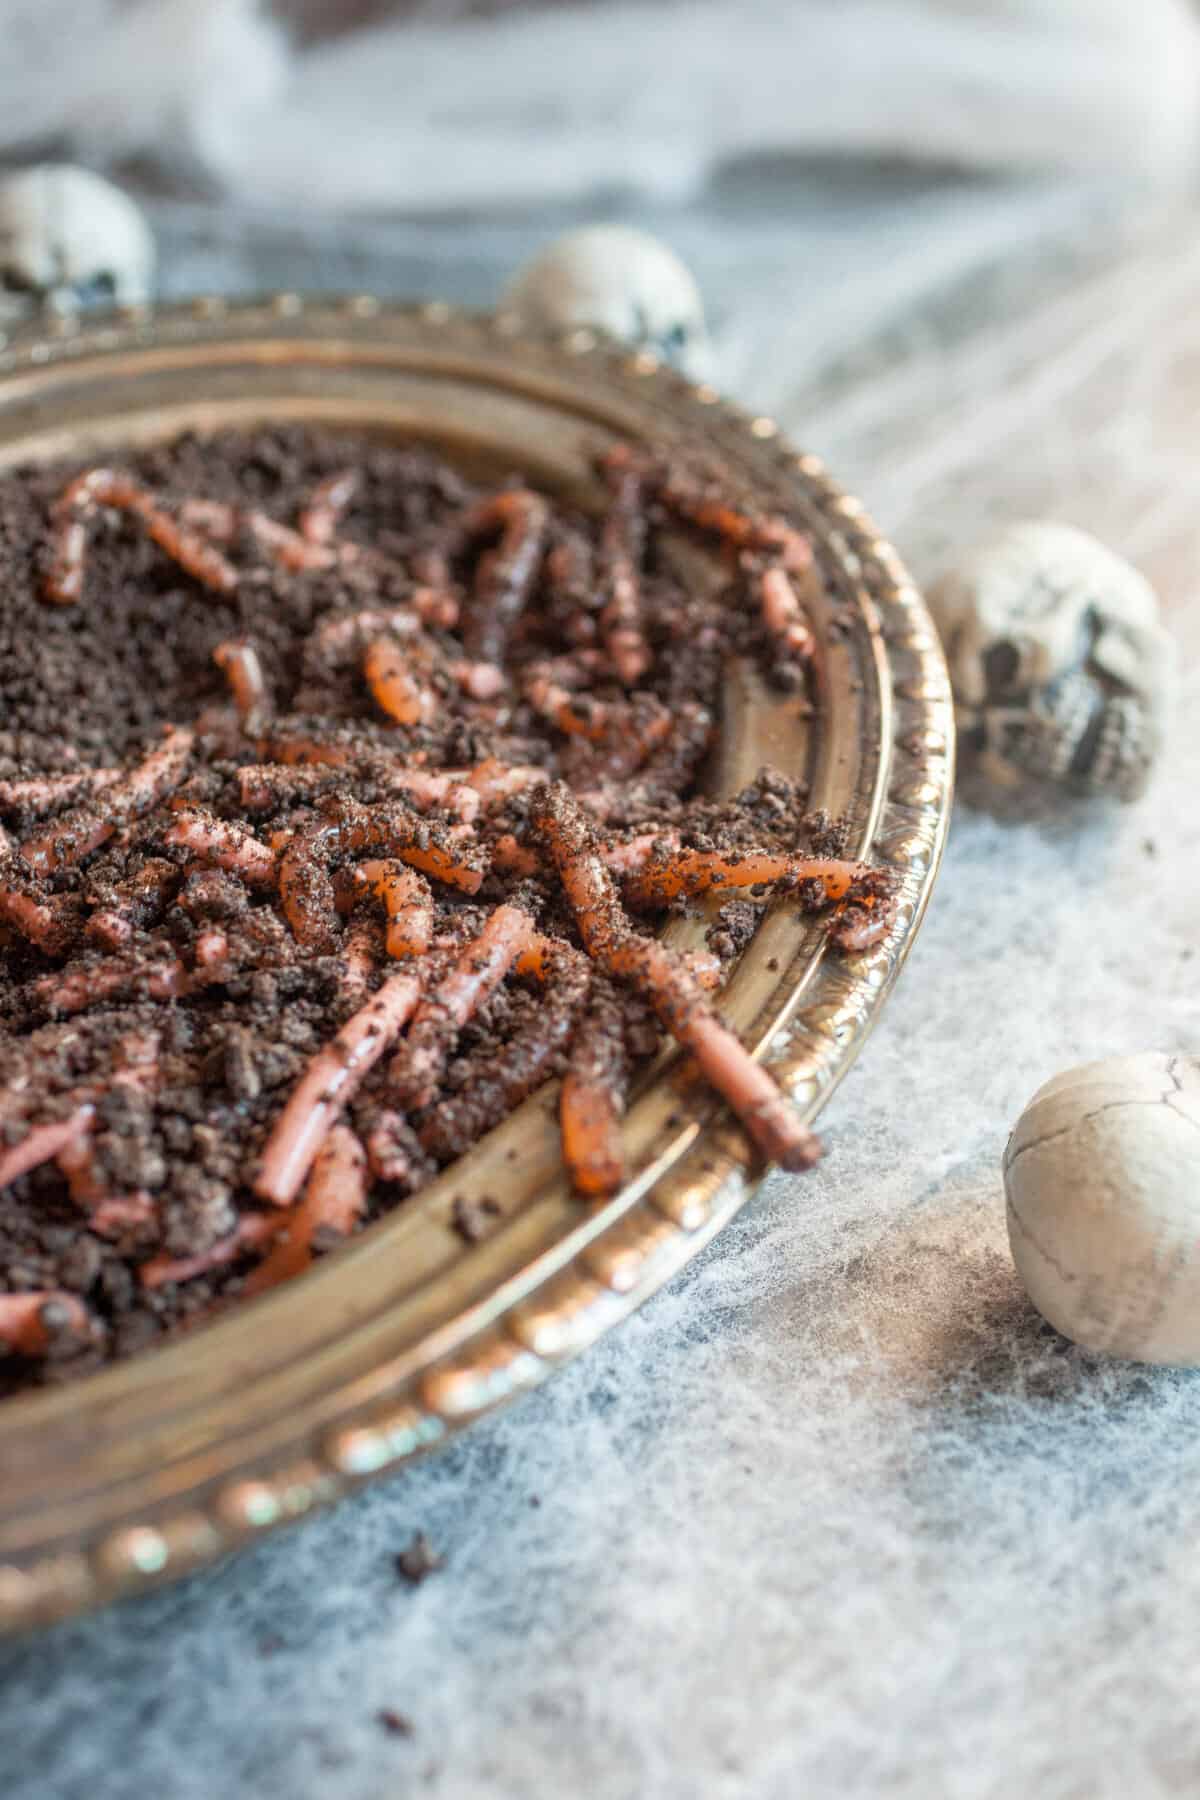
It’s always cool to have a really gross dish of treats out for Halloween and these Homemade Realistic Worms are definitely a winning recipe. My near-3-year-old freakin’ LOVED these and having them out for a Halloween party treat would be the best.
The worms are pretty straightforward to make. Basically they are a really sturdy gelatin mold that you mix with cream to produce a kind of milky texture. The cream also gives the worms some great color. Every time I’ve made them (more than once), I’m surprised at how realistic they look.
There are just a few simple ingredients for these guys. You can make 100 worms for under $10 depending on Oreo costs in your neck of the woods. They were definitely the most expensive part for me.
Realistic Homemade Worms
Ingredients
- 50 flexible party straws, cut in half or 100 full ones
- 1 6 ounce box of red Jell-o flavoring of your choice, raspberry, cherry, or strawberry are your options I think
- 4 packages gelatin.
- 4 Cups boiling water
- 1 Cup heavy cream
- 15 drops green food coloring
- 20 Oreo cookies, You could set the out without the dirt, but the dirt is pretty tasty honestly.
- Foil or wax paper
- An empty paper milk carton or a tall jar or plastic container to keep the worms in while they harden.
Instructions
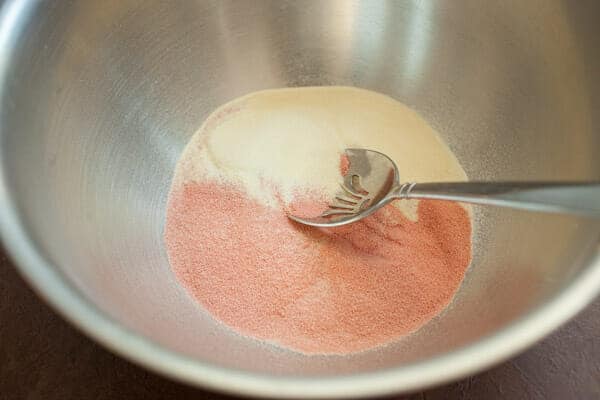
- Pour Jell-O and 4 packages of gelatin ingredients all into a large bowl and mix them up well. Make sure you don’t have areas of just gelatin or it might not distribute well and you’ll have jelly clumps in your worms!
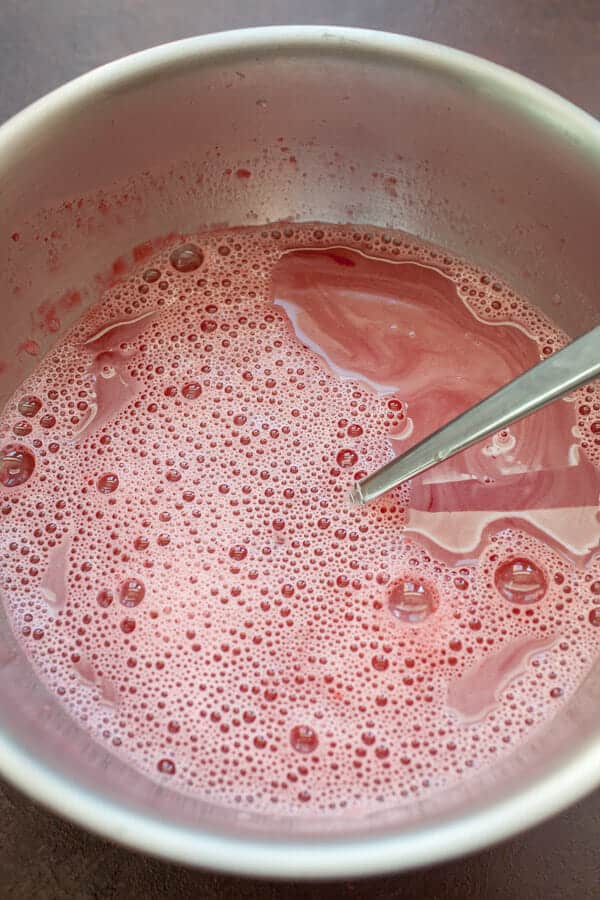
- Add 4 cups of boiling water and stir it up well until everything is dissolved.
- Set the bowl in the fridge for about 20 minutes until the liquid is room temperature. SET A TIMER because if you forget about it, it will turn into a very large red block which will be very hard to re-liquefy.
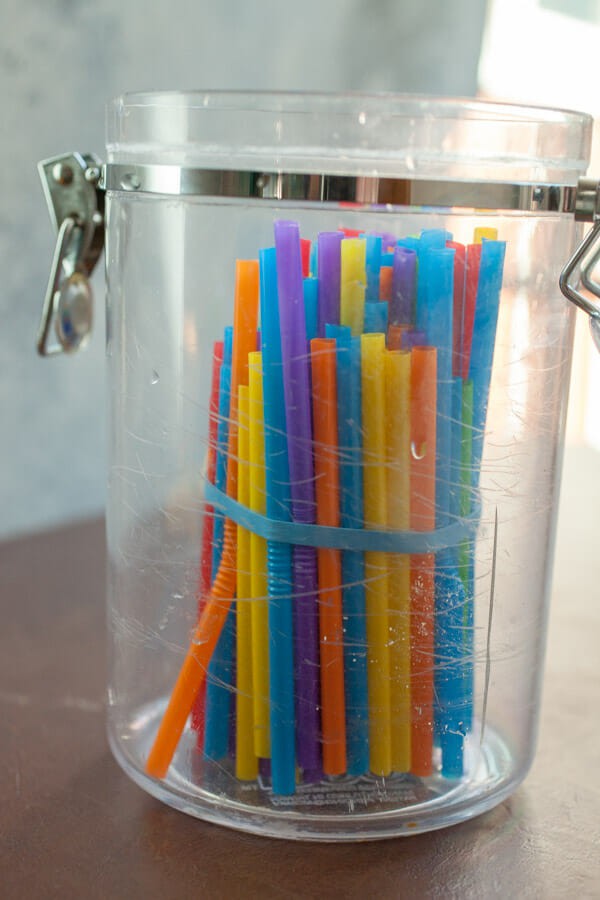
- While your mixture is cooling, you can get your straws ready. The ones with the bendy necks work best because they give the end of the worm some texture. Make sure you extend the straws to the maximum length by pulling on the ends. Stretch them all out and then secure them with a rubber band so you have one big bundle. If you use the bendy neck straws, make sure to put the bendy necks at the bottom of your container!
- Once your bundle is together, stick it in a milk carton (washed).
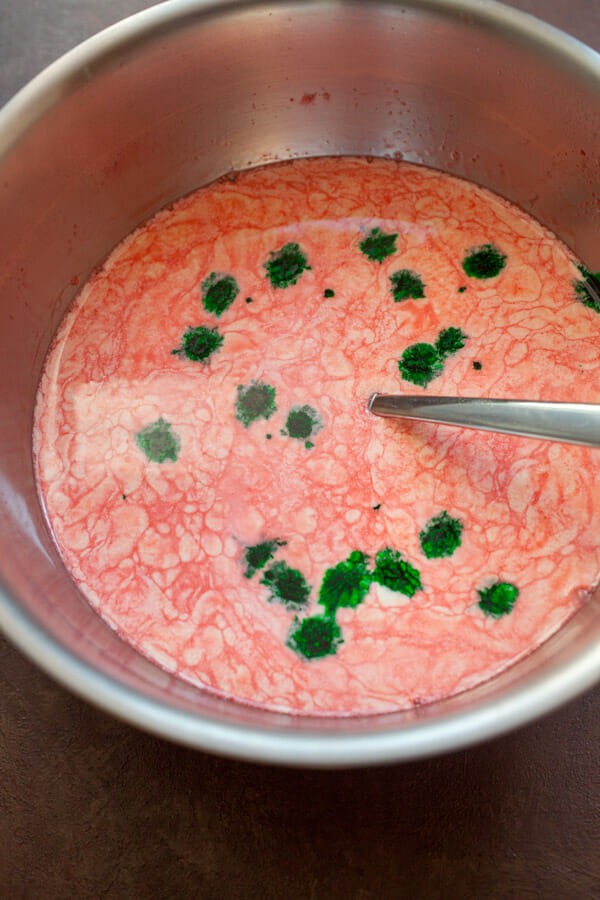
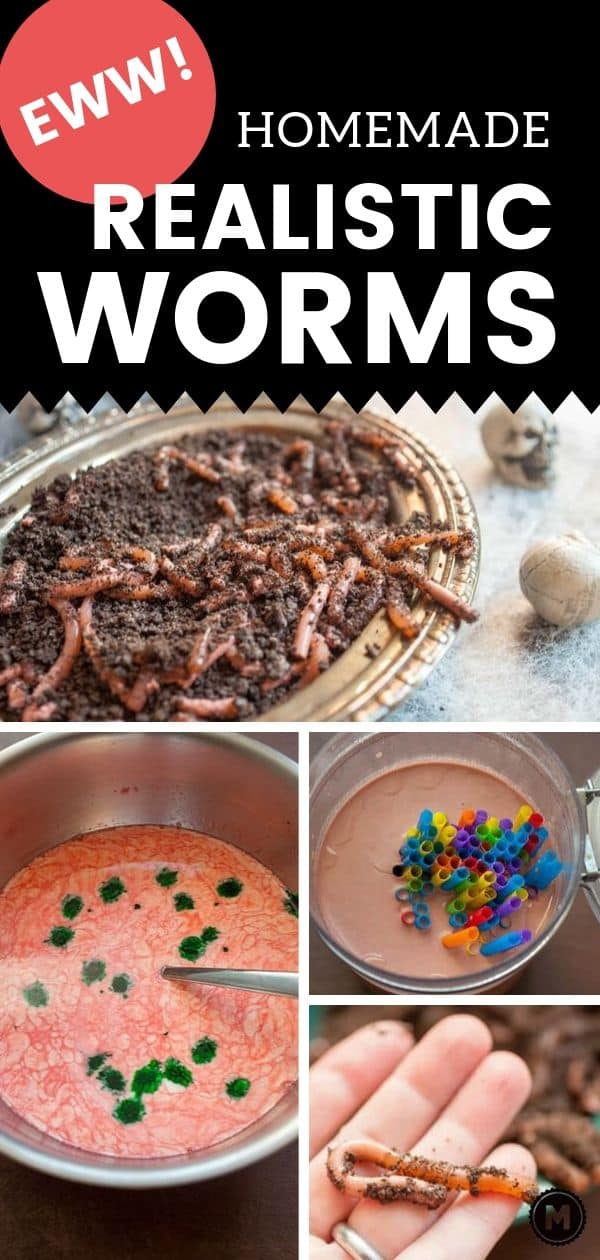
- Once mixture is room temperature, add cup of cream. Mix it up well. Add green food coloring.
- Whisk the food coloring and everything together and then pour it over straws and fill up the container.
- Let this chill in your fridge overnight or for at least 4 hours.
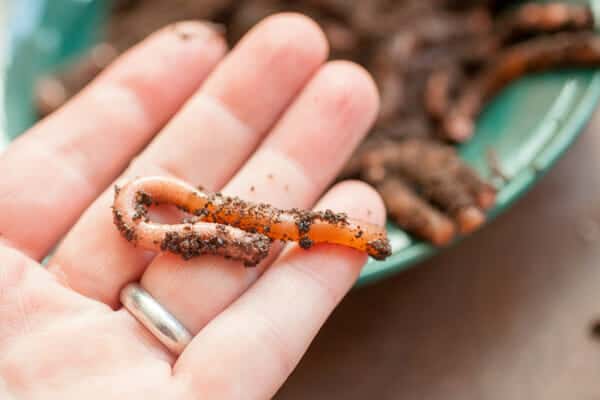
- Cut apart your carton and get your straws separated from the mold. Then lay out 12 inches or so of wax paper and starting from the non-bendy end of the straw, squeeze out the worm using your fingers! If the straw or your hands get slippery, have some paper towels on hand to dry out.
- Squeeze the worms out on the wax paper in a mound of crushed oreos to keep them from sticking.
- Toss the worms in the dirt and pile everything up in a big bowl!
Nutrition
Did you make this recipe?
Making the Worm Mixture!
If you’ve ever made Jell-o then you can probably handle this. First, get your Jell-o ready along with your 4 packages of gelatin.
Pour these ingredients all into a large boil and mix them up well. Make sure you don’t have areas of just gelatin or it might not distribute well and you’ll have jelly clumps in your worms!
This is how it should NOT look.
For regular Jell-o you mix some hot and some cold water but for this we want to use all hot water or we’ll run the risk of not dissolving everything well. That’s a LOT of gelatin in the bowl and want to make sure it gets all dissolved.
For regular gelatin users, there’s no need to “bloom” the gelatin for this recipe. By mixing it together with the Jell-o packet it distributes the gelatin crystals enough to avoid clumping.
Anyway, then add 4 cups of boiling water and stir it up well until everything is dissolved!
Cool the mixture
We need to add some cream to this, but don’t do it now! I made this mistake the first time I did it because I wasn’t thinking and my cream immediately curdled and I had to start all over. To do it correctly, set your bowl in the fridge for about 20 minutes until the liquid is room temperature. SET A TIMER because if you forget about it, it will turn into a very large red block which will be very hard to re-liquefy.
Once your mixture is room temperature, add your cup of cream. Mix it up well.
Also add your green food coloring now which gives the worms a bit more bloody and doom-like coloring.
Note on the cream: It’s pretty hard to get your cream completely combined. It’s okay if there are some dots of cream in there. It also might separate a bit in the final product, but it should still harden without a problem.
Whisk the food coloring and everything together.
Worm molds
While your mixture is cooling, you can get your straws ready. The ones with the bendy necks work best because they give the end of the worm some texture. Make sure you extend the straws to the maximum length by pulling on the ends. Stretch them all out and then secure them with a rubber band so you have one big bundle.
You might think that 50 straws is a lot, but once you cut them in half it really doesn’t take that long to handle them. Once your bundle is together, stick it in your carton or container. I decided to use a very large, tall jar I use to store oatmeal normally.
In hindsight, I would’ve used a milk carton (washed obviously) because these straws were a pain in the neck to remove once they were solidified and with the milk carton you can just cut it apart.
One note on straws
If you use the bendy neck straws, make sure to put the bendy necks at the bottom of your container! If they are at the top, your mixture might not fill up high enough to get to the bendy part and you’ll have non-textured worms. If I went to a Halloween party and they had non-textured worms, I would probably leave. Just saying.
Making the worms
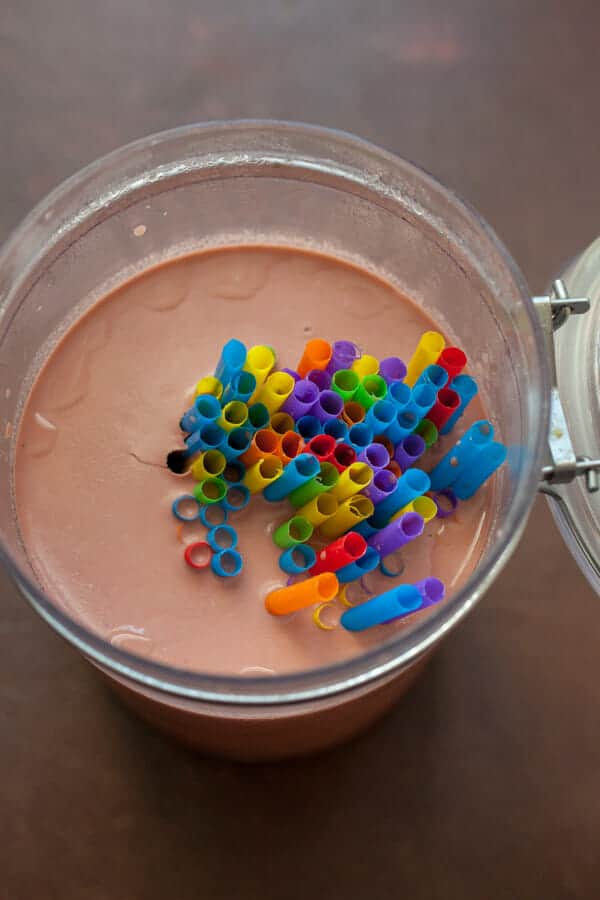
Pour it over your straws and fill up your container. It probably won’t go all the way up the straws. Let this chill in your fridge overnight or for at least 8 hours.
Ok. Now for the fun part. Cut apart your carton and get your straws separated from the mold. Then lay out 12 inches or so of wax paper or foil and starting from the non-bendy end of the straw, squeeze out the worm using your fingers! If the straw or your hands get slippery, have some paper towels on hand to dry out.
I like to make a little bed of crushed Oreos to help keep them separate.

I will say that it does take 15 minutes to actually get all the worms out of the straws. For me, it was fun for about the first 30 worms. Then it got old. If I would’ve had like two helpers it would’ve been perfect.
Want to see what I was talking about how I chose the wrong vessel for keeping the straws in place? I had to pry each straw out of this disaster:
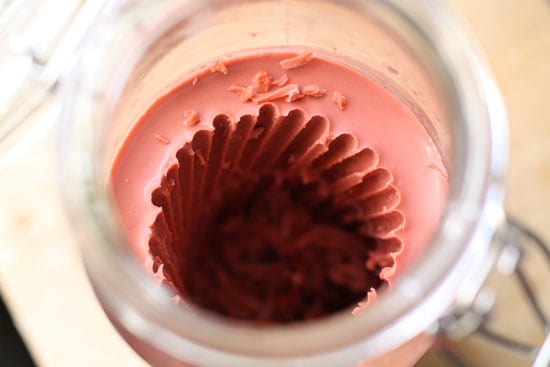
A carton would’ve been much easier.
Making the dirt
Take 20 or so Oreos and remove the fillings with a spoon. Then give the cookies a spin in a food processor or you can just crush them up by hand. Toss the worms in the dirt and pile everything up in a big bowl!
This was kind of a long post, but now you know how to make worms!
These weren’t really that much work although if you’re like me, they will leave your kitchen and fingers covered with a faint red coating. But seriously, the final product is pretty cool I think.
Jason Sandeman
Awesome! I love the final touch of the straws bands making the ridges in the worms. This recipe would be awesome for those gross-out Halloween parties.
katklaw777
Dude, just buy gummy worms next time!!!
I have made pots of dirt(choc.pudding) with earth(crushed oreo, leave middles in, you can't tell)and gummy worms for 20 years.
I really appreciate your efforts but if life gives you a break take it. Buy your worms ready made and sigh with relief.
???What pray tell did you do with all the jello in the jar???
Nick
@kat Haha. Yea… It's kind of more of a crafts project than a fastest way to get gummy worms thing. ;)
Got any ideas for leftover jell-o?
Karolinka
Man-o-man. You have much, much more patience that I do. Just reading this post made me tired.
Jamie Milbrandt
We saw these yesterday on another website and are going to make them this weekend for our Halloween party! I love the dirty addition though. Thanks for the post!
Olga
how creative! but I almost threw up looking at these :) guess, you've achieved what you set out for.
incrediblecrunchyfla
this is intense, even for a crazy person like me who makes her own gnocchi and marshmallows… :)
Cindy
i’d love to know how to make marshmallows!!
Rose
AWESOME! Those are so freaking cool. I love it!
Sheila | Live Well 3
OMG. They look so real!
dawn
that first pic is disgusting! but I love it.
they really do look so real. submit these bad boys to tastespotting.
Nick
Haha. Thanks everyone. Yea. You definitely can get the color just right if you make them yourself. I've never seen storebought worms with the deep red color like that. :)
Yasmin
EEEW! That is so gross! ; p
Steph
This is probably the coolest jello thing or anything I've seen someone make!
Katie
That is amazing! They look so real and freaky (and disgusting!)
Becca
I wonder if it would be faster to squeeze the worms out of the straws with, say…a rolling pin? Maybe you could do 5 or so at a time that way? Just a thought. :-)
Jamie Milbrandt
We just made a batch and have them chilling in the fridge! I hope they turn out. Thanks again for the post
Elizabeth
Awesome, I love you effort! Always better from scratch, although I don’t know that I would be trying this one out. Just thought I’d mention, that you can buy oreos already crushed up sans filling. Just an FYI, it’s cheaper than the whole cookies.
Mama Taney
Nick,
We have a Halloween party every year, and, as the mama of two little boys, I can guarantee you that these will most certainly be added to the list of things to make!!
Leonardo Xavier
Worms, Bloody Worms! Awesome idea folk!
Jo Bailey
Can't wait to try them we are having a critter dinner and I'm taking a bucket of fishing worms I think the extra work is worth it thx !
Angel Nicolau
Sorry 'bout my English… but I'm writting from Spain, so excuse me please… This recipe is absolutely amazing. Seems like the worms are real! There's a weblog I know that makes another recipe that fits really well on a Halloween menu. Have a look at it, http://destapantcassoles.blogspot.com/2010/10/hal…
and If you want at my own blog, http://lacuinadelangel.blogspot.com
My recent post La Cuina de lÀngel fa un any
Michelle
Thank you so much for this recipe. Looked way too cool so my daughter and I had to make them for her Gross Halloween Party. We made all of our own gross candy for the neighborhood kids and we used it as a homeschool science project. Thank you again!
lucy
I made these for work today, I left a little pot of dirt with worms on each person’s desk, they loved it even though it’s unusual to celebrate Halloween in Australia. I found a trick that if you pull the straw over the handle of a piece of cutlery it is much easier and your hands don’t get so tired.
Gen
We made these for my daughter’s Halloween party. It was a fun project for my daughter and I to do together. The kids really got a big kick out of them. Thanks for posting the directions.
Michelle B
Just made these, my 7 yr old son loves these worms!! So cool!!
Karin
Made these for the office party – pliers make it a whole lot easier to hold the straws. It was fun and they were a big hit – thanks!!!
LiAna
To get the worms out a lot easier without the sore fingers, line a few of the straws up and use a rolling pin starting at the bottom and they will pop right out. :)
Destiney Yates
I herd the story of these worms and had to check it out now i just want to know what the faces you got handing these out looked like would have been worth the effort lol
Cindy
Can’t wait for next year!!! My grandkids will love these!!!!
Karl Lembke
Some years ago, I saw a trick that involved pushing strands of dried spaghetti into sections of frankfurters and boiling them to get the effect of works coming out of fingers.
How about beet spaghetti, to look more like blood vessels?
Iris
YOU’RE A GENIUS !!!
Tanya
This is brilliant! One neat tip: pour the liquid into your container that you’re using and slowly lower the bundle of straws into the liquid top off if necessary
Cheryl
Just buy a silicone worm mold from Amazon